Distribution Profile
To share builds with testers, distribution profiles should be created and testing groups assigned to these profiles.
Creating a Profile
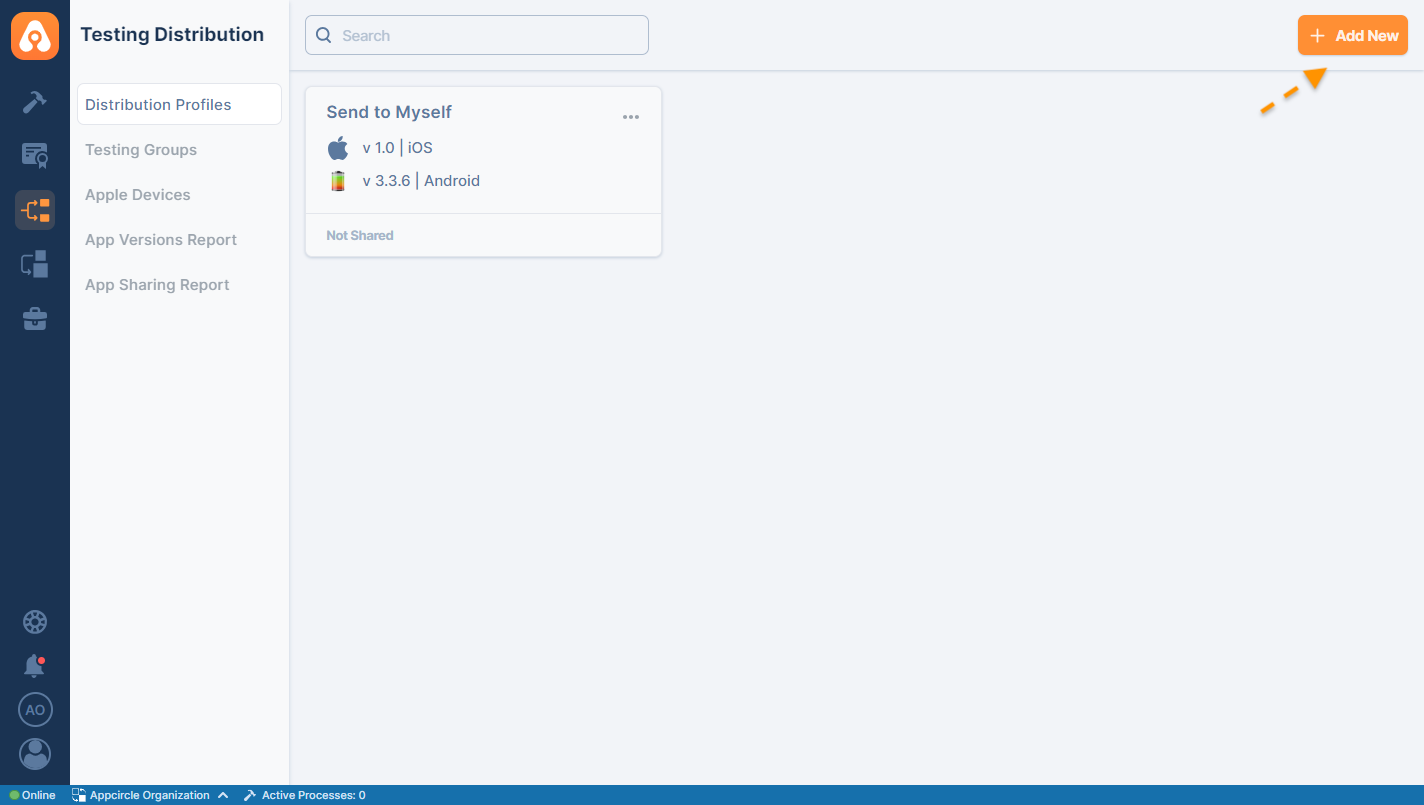
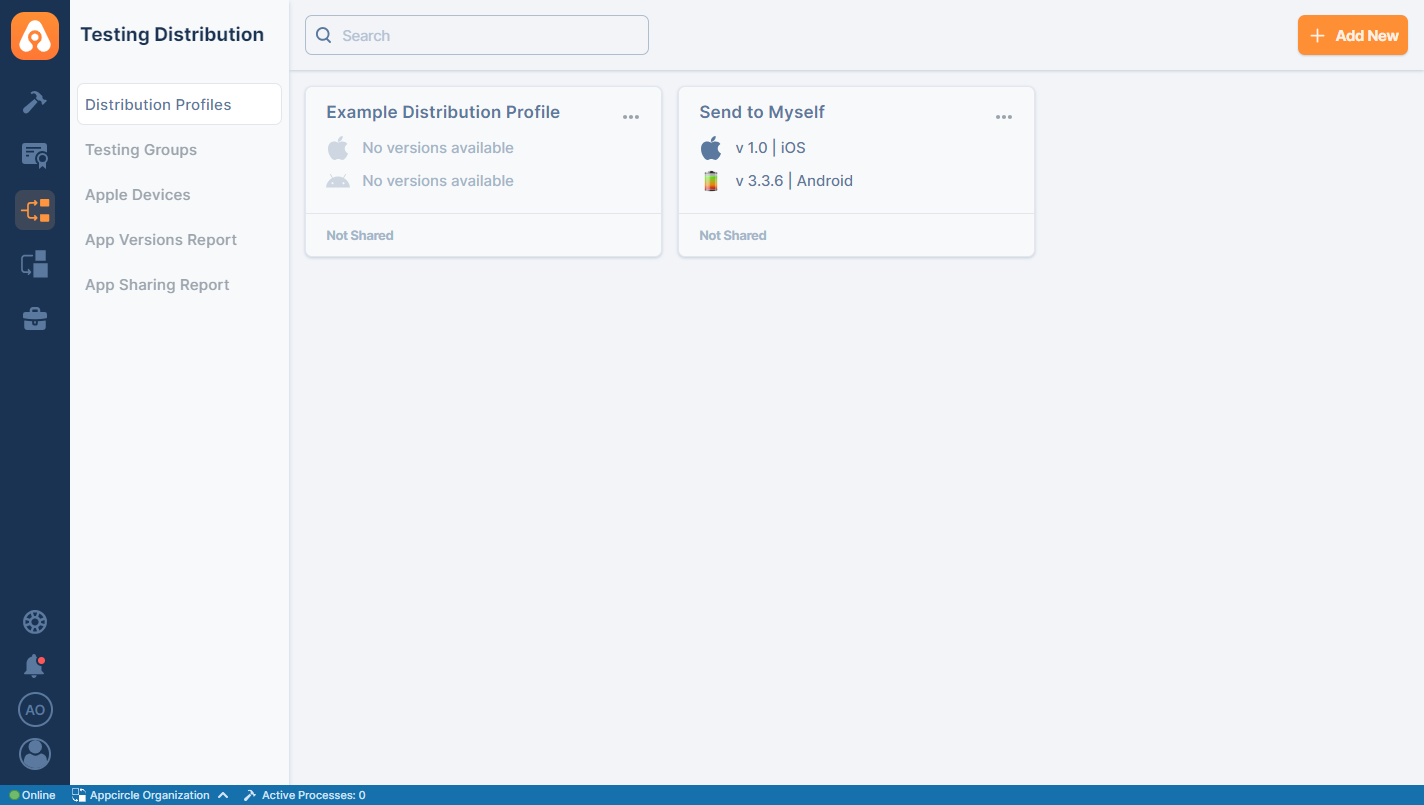
Select the Testing Distribution from the left and click on the Add New button. Give a name to your distribution profile.
As a best practice, we recommend using one single distribution profile for both iOS and Android versions of the same application.
Profile Actions
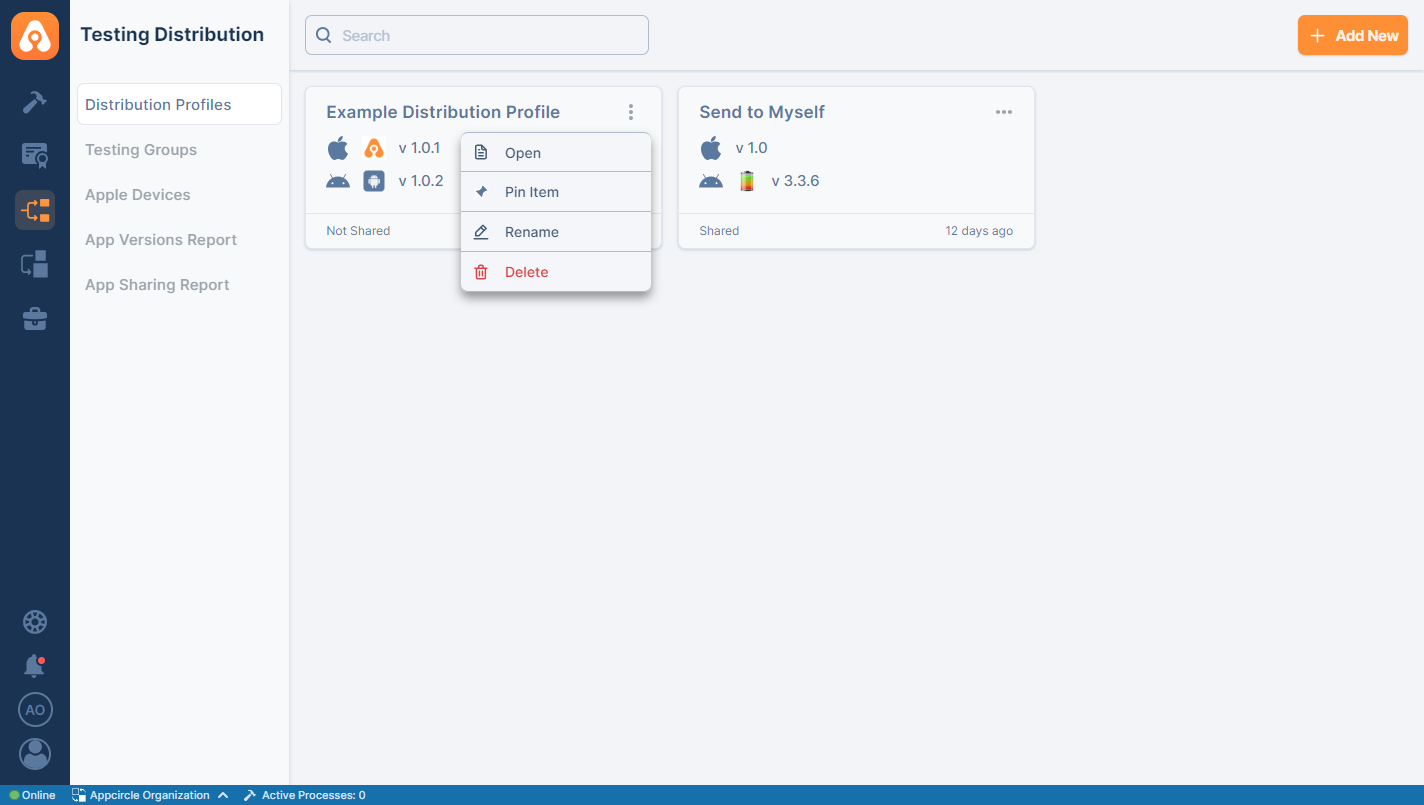
Rename a Distribution Profile
The Distribution Profile can be renamed by following these steps:
- Click on the three dot on the top right of the profile menu.
- Click
Rename. - Enter the new name for your profile.
Pin a Distribution Profile
The Distribution Profile can be pinned by following these steps:
- Click on the three dot on the top right of the profile menu.
- Click
Pin Item.
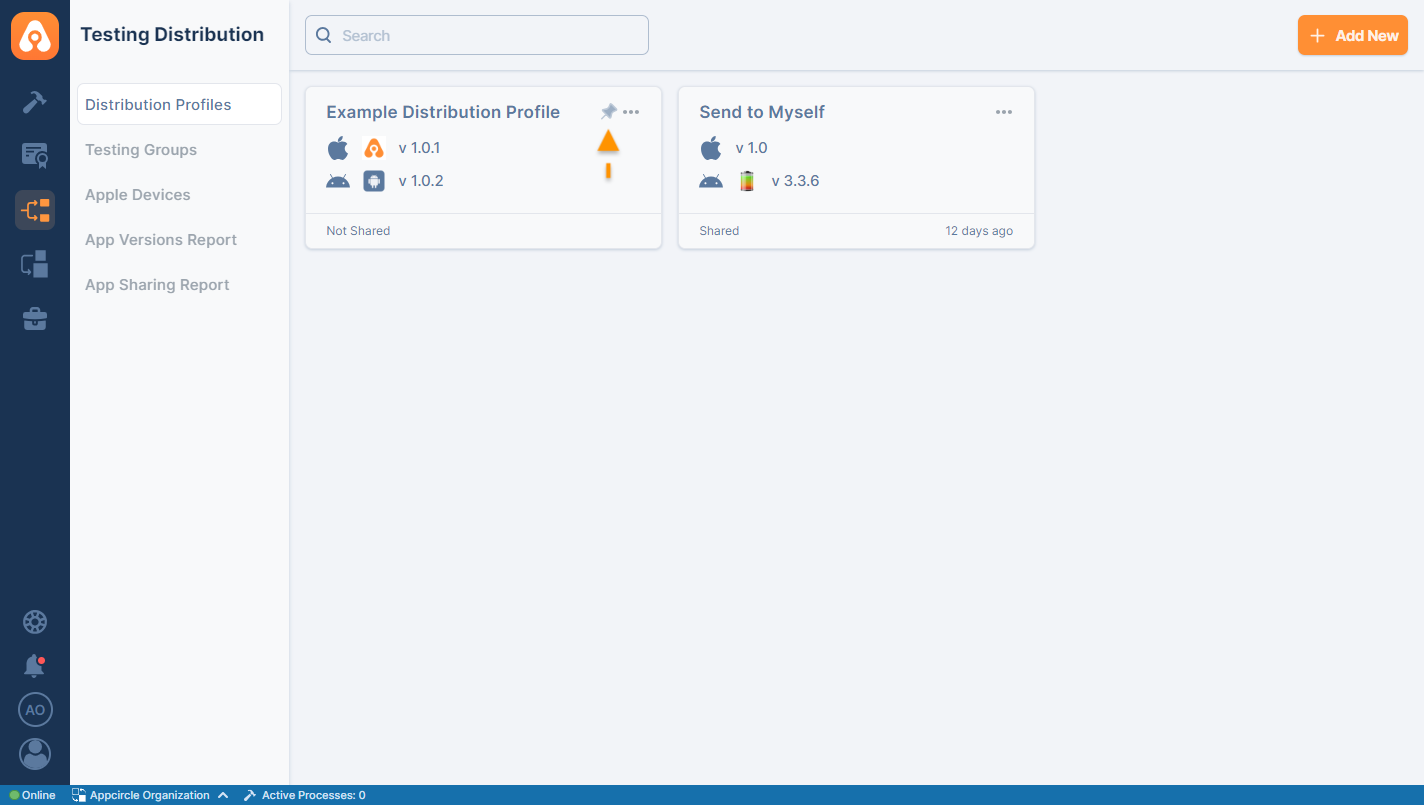
Pinned profiles will stand out by appearing first in the list, making them easily accessible and distinguishable from the rest of the profiles. A pin icon will also be displayed on their profile card.
Delete a Distribution Profile
To remove clutter and/or free up storage, an entire profile can be deleted with a single click:
- Click on the three dot on the top right of the profile menu.
- Click
Delete. - Go through the confirmation dialog.
To free up space, other references pointing to the artifact should also be removed. For example, if the same artifact is present in the builds, those artifacts should also be deleted.
Uploading Binary
Manual Binary Upload
Pre-built iOS or Android applications can be uploaded for distribution or preview by using the upload field on the right panel (if no version is available) or the "Upload New Version" button at the bottom right (if versions are already present) to upload files to the distribution profile.
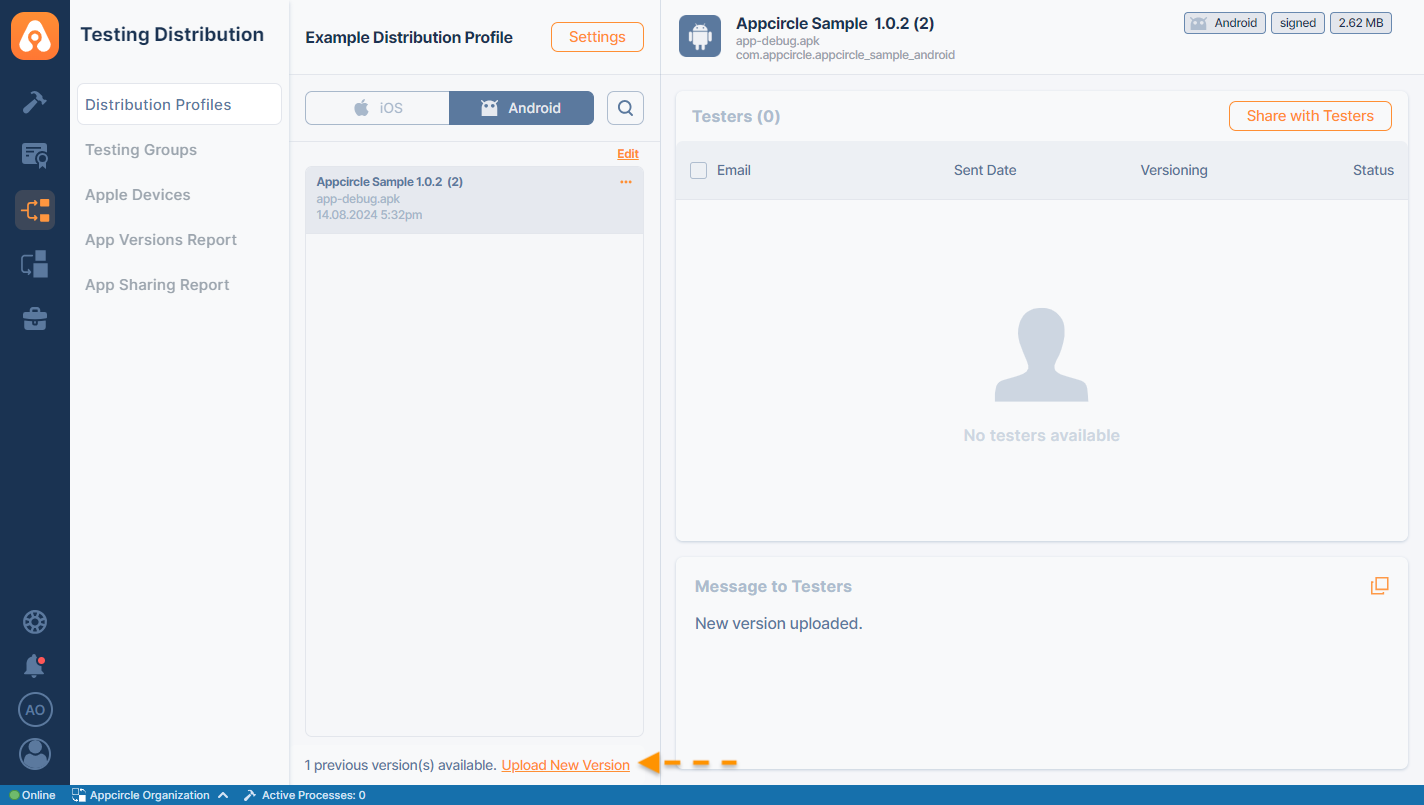
After the file is uploaded, it is checked for errors and parsed for metadata. Any errors that occur will be displayed in the upload area.
.png)
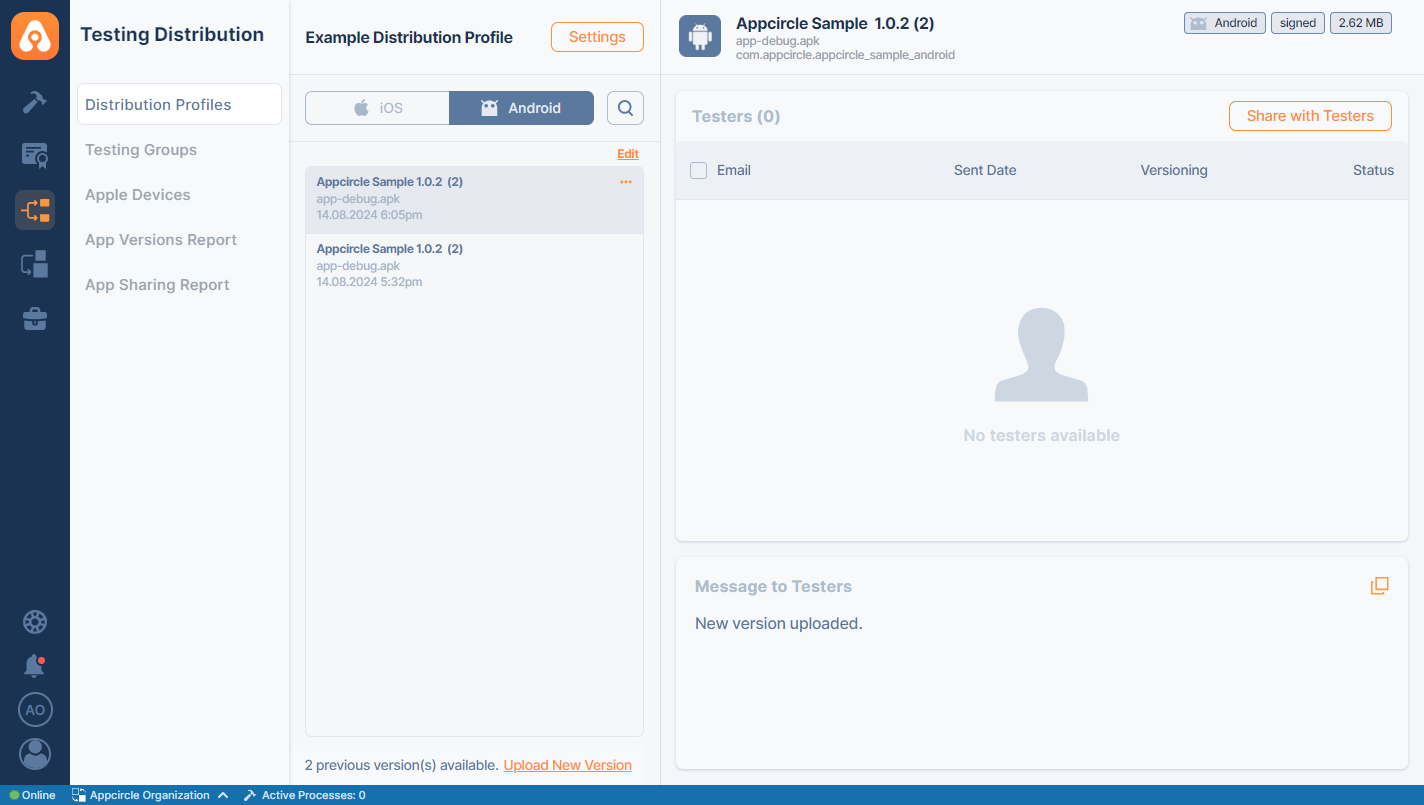
Once the upload is complete, the new version will be added to the top of the list with parsed metadata. This version can then be shared with testers or previewed on a virtual device in the browser.
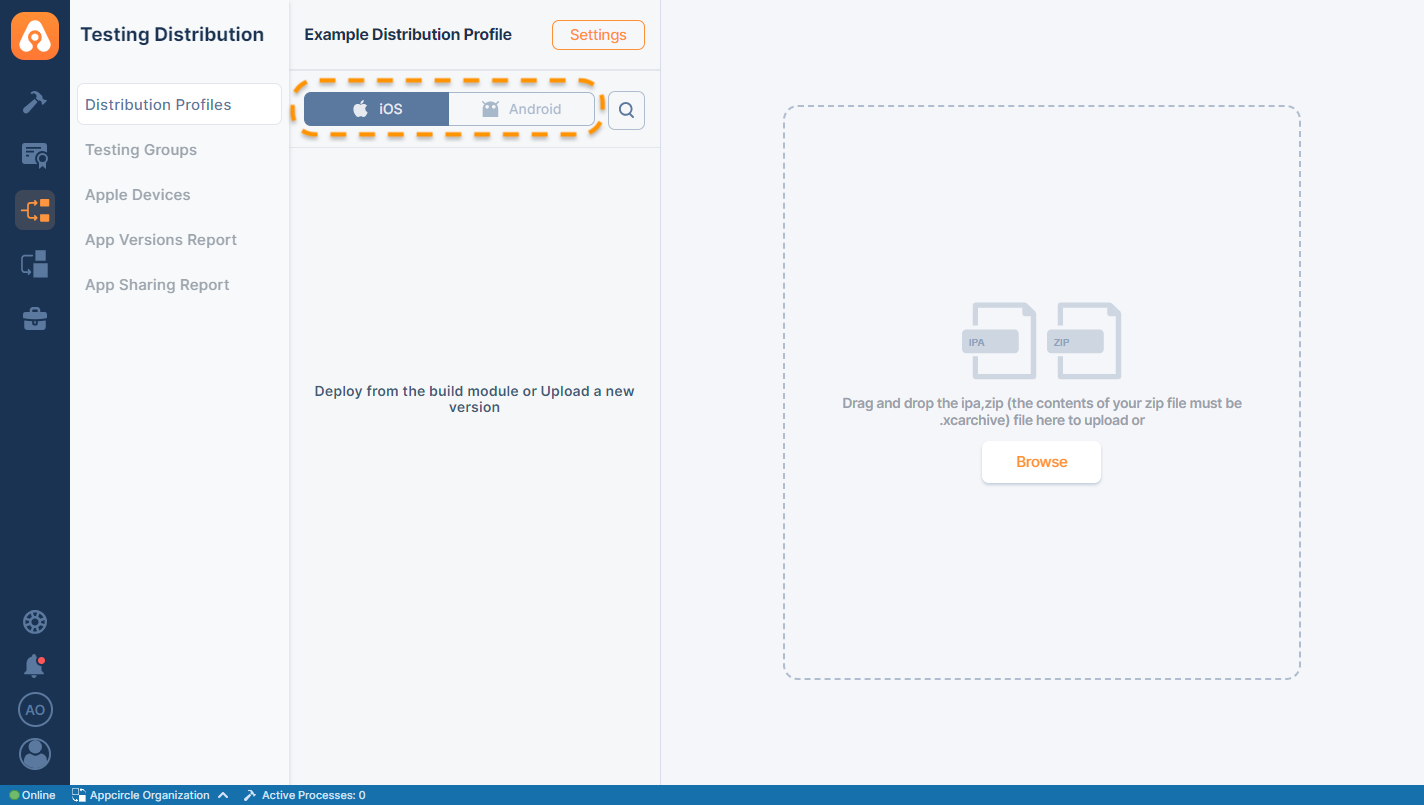
Please note that iOS and Android binaries are displayed in separate tabs. The required OS tab should be clicked to navigate between them.
Upload via Build Module
With a successful build, a new version of the application will be added to the distribution profile.
Simply go to Build Module > Build Configuration > Distribution and select a distribution profile you want your build to be sent.
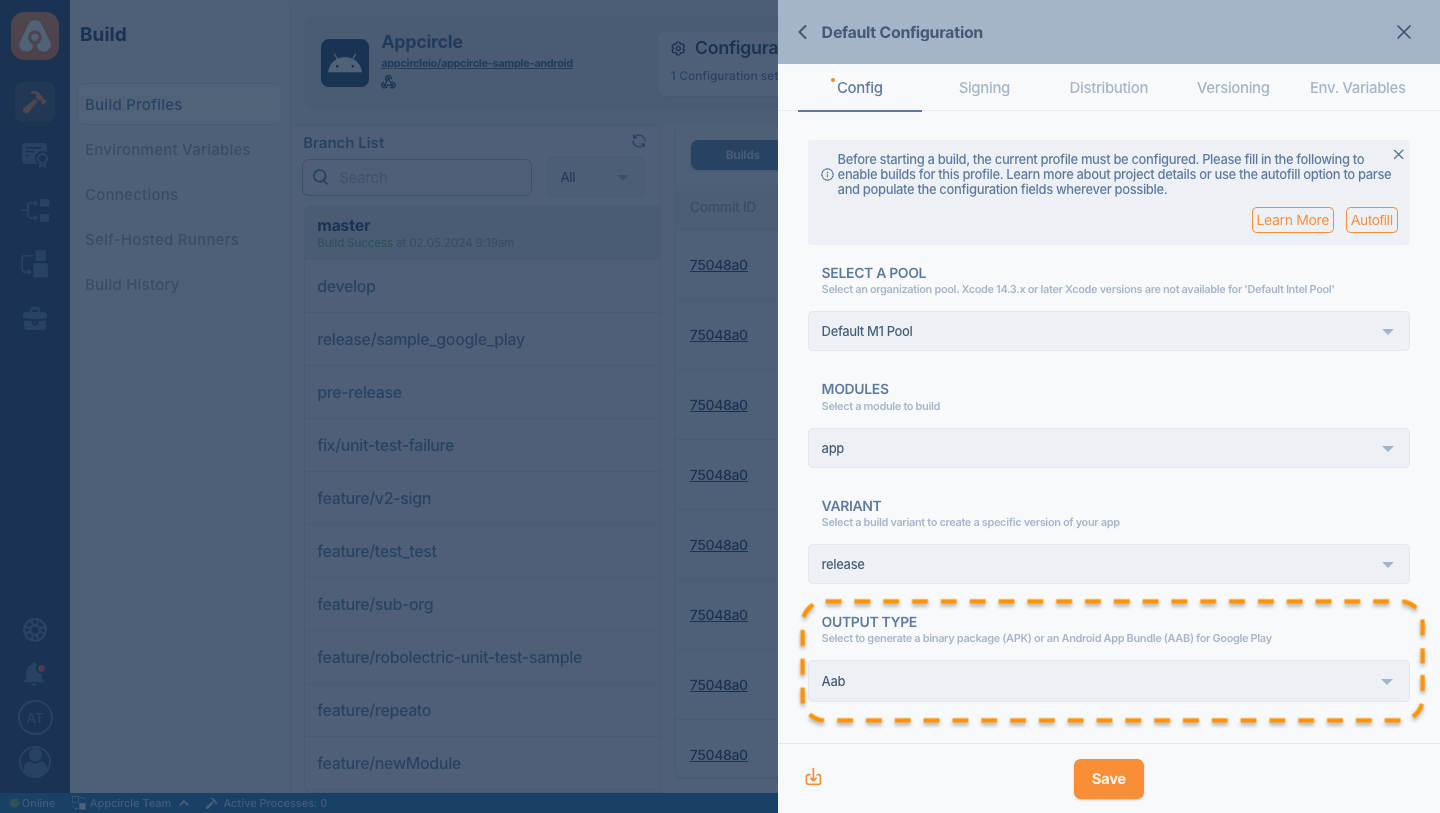
The Android build output can be selected as .AAB (Android App Bundle) from the configuration settings within the Build profile.
When the .AAB build is sent to the designated Testing Distribution profile, either automatically or manually by uploading the file directly within the Testing Distribution profile, it will be automatically converted to .APK format when shared with a Testing Group. This ensures that the .APK format is used for the artifact downloaded by the receiving tester.
This conversion capability also applies when app versions are sent from a Testing Distribution profile to an Enterprise App Store profile. The shared .AAB artifact will be converted and downloaded in .APK format from the Enterprise App Store profile.
Only signed builds will be distributed. Unsigned builds will not be distributed.
Android applications with multiple flavors
For detailed information about multiple flavors, refer to this documentation:
Building Multiple Apps in One ProfileIf multiple product flavors are present in your Android application, a build will be created for each flavor, allowing for simultaneous distribution. A common use case for multi-flavor applications includes offering free and paid versions of the same application.
When an application with multiple flavors is built and distributed, an .apk file will be created for each flavor. Once distributed, all of the binaries will be visible on the distribution profile
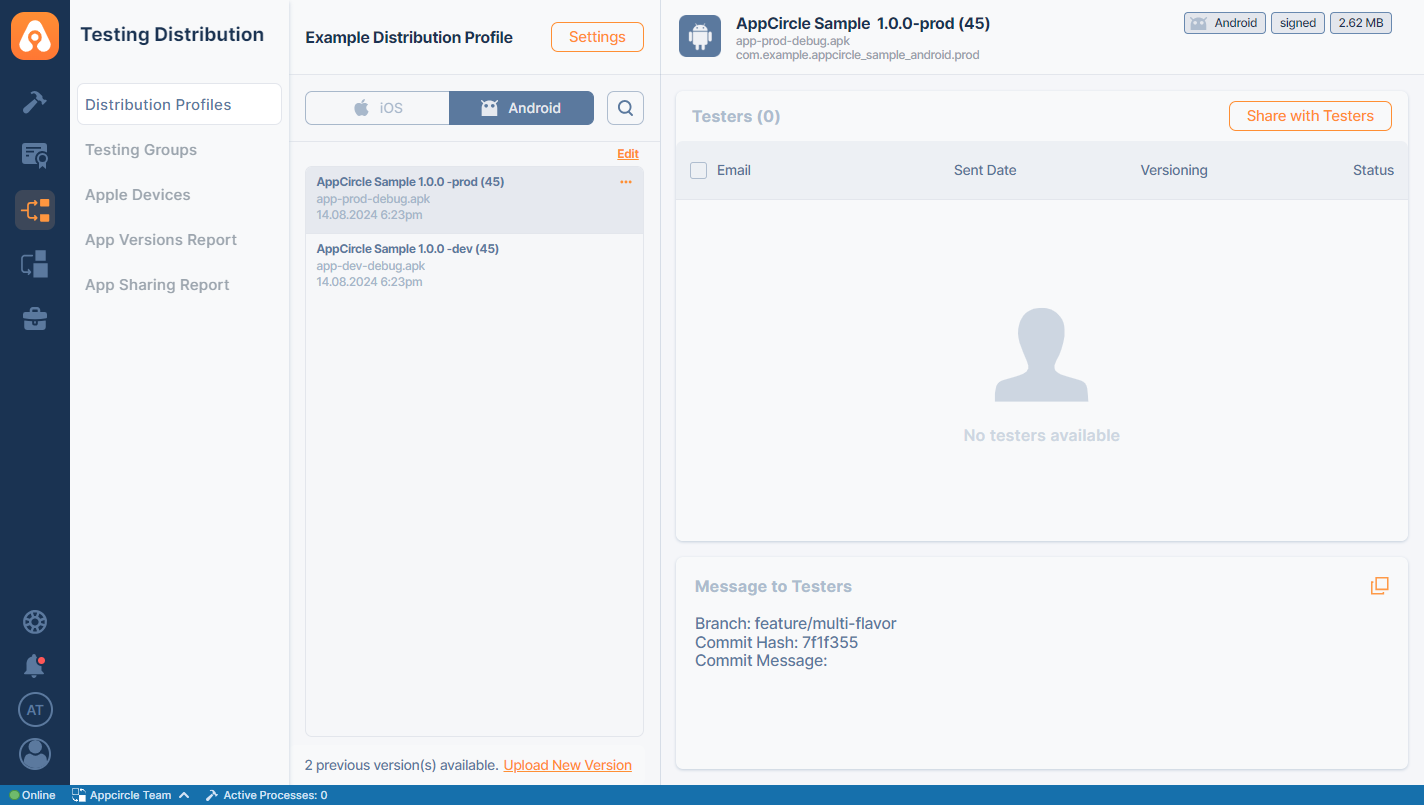
How to see the multiple flavor results
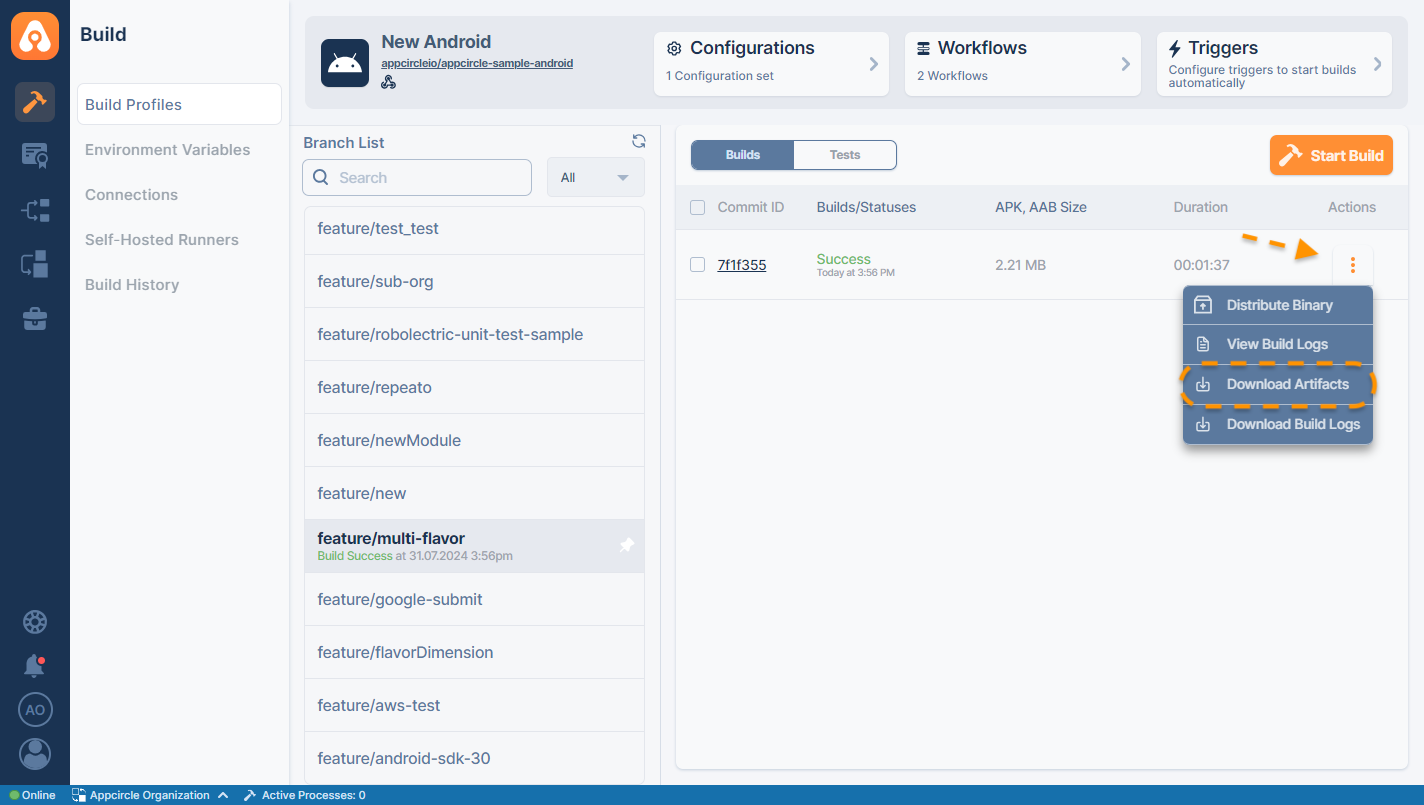
If you also want to download or see the output, you can check through the following steps within the Build Profile:
- Click the three dot under the actions tab
- Click Download Artifacts to see all the build outputs.
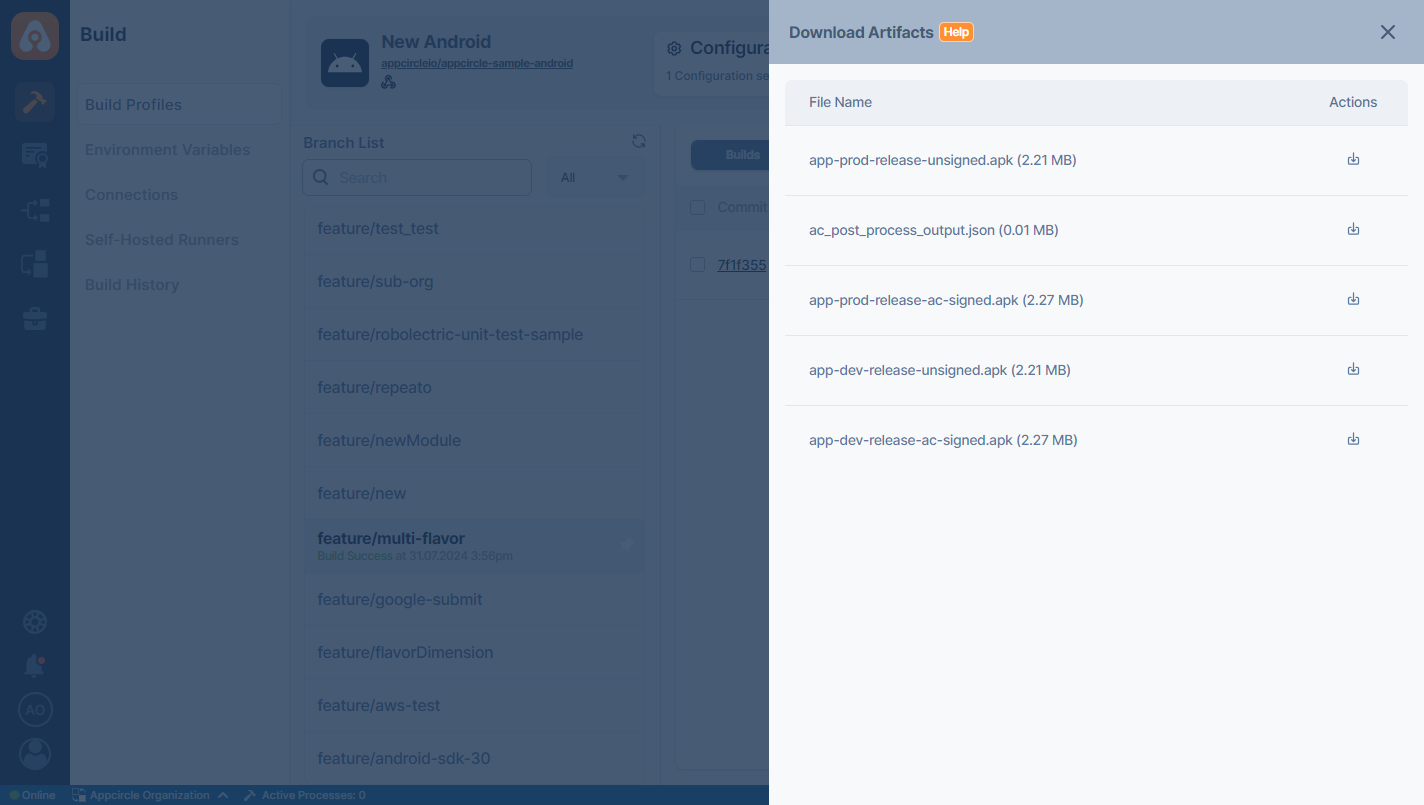
If your Git commit has any messages, they will be included in the distribution in Message To Testers area.
Upload using API & CLI
If you use your own CI structre, you can use our Appcircle API & CLI to upload binaries to your Distribution Profile.
To get more information, please refer to our API & CLI documentation.
Settings
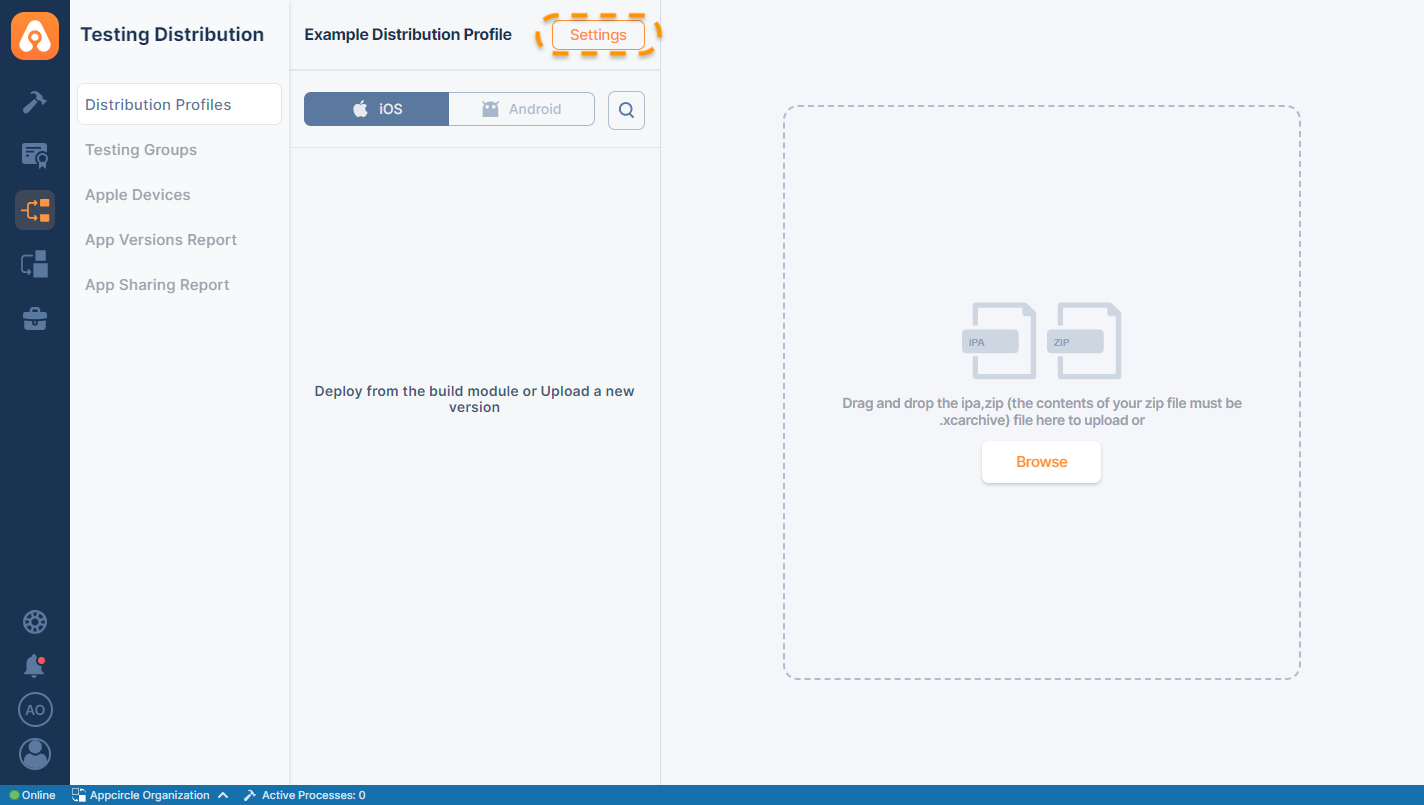
The settings of your distribution profile can be customized. Click on the distribution profile, then click the settings button within the profile.
Information
The Info tab allows you to enter the publisher information for your distributed applications.
You can submit your Publisher Name, Contact Email, Privacy Policy URL, and Terms of Service URL.
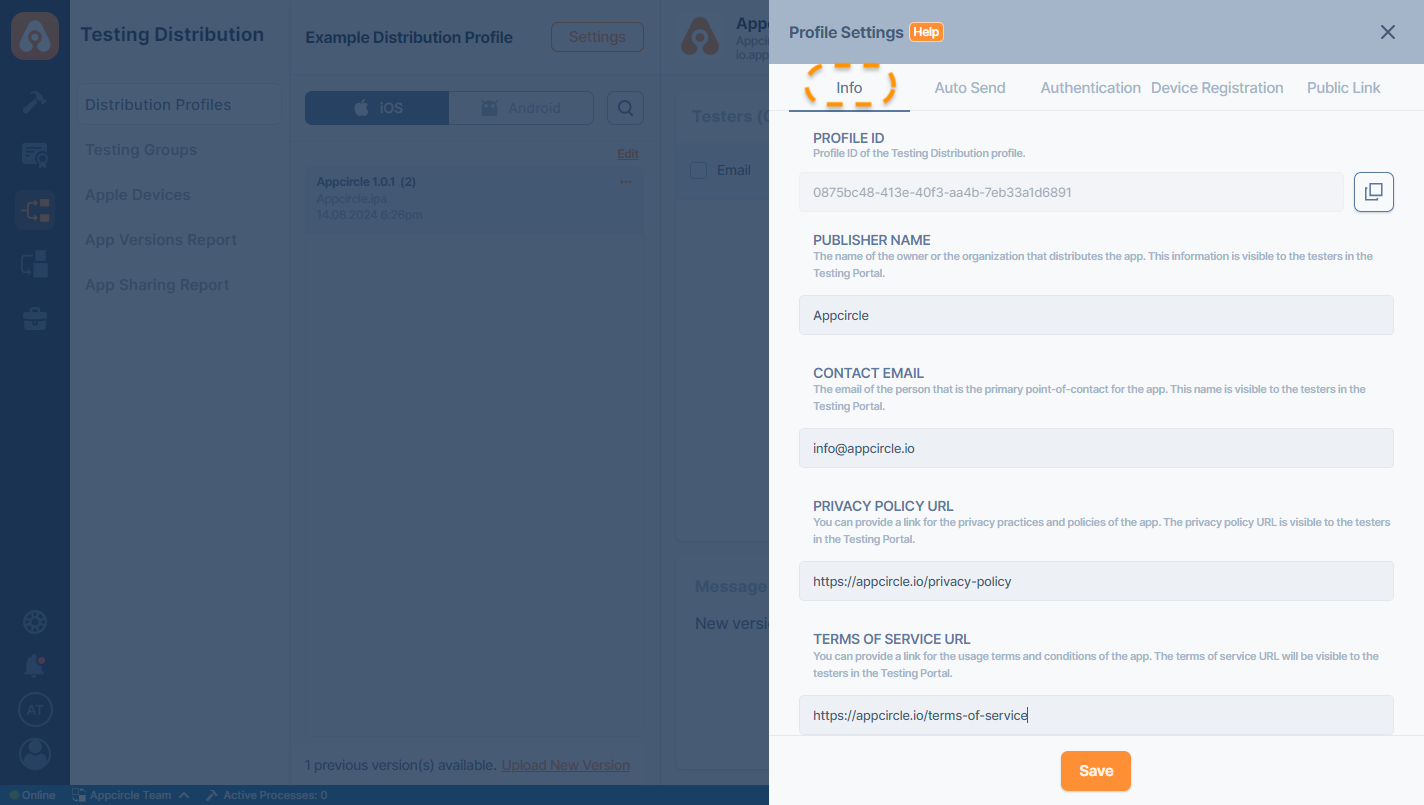
Once you click the save button, the information you have provided will be displayed on the Tester Portal.
Tester PortalWhen the tester selects the user icon, the Publisher Information will be displayed.
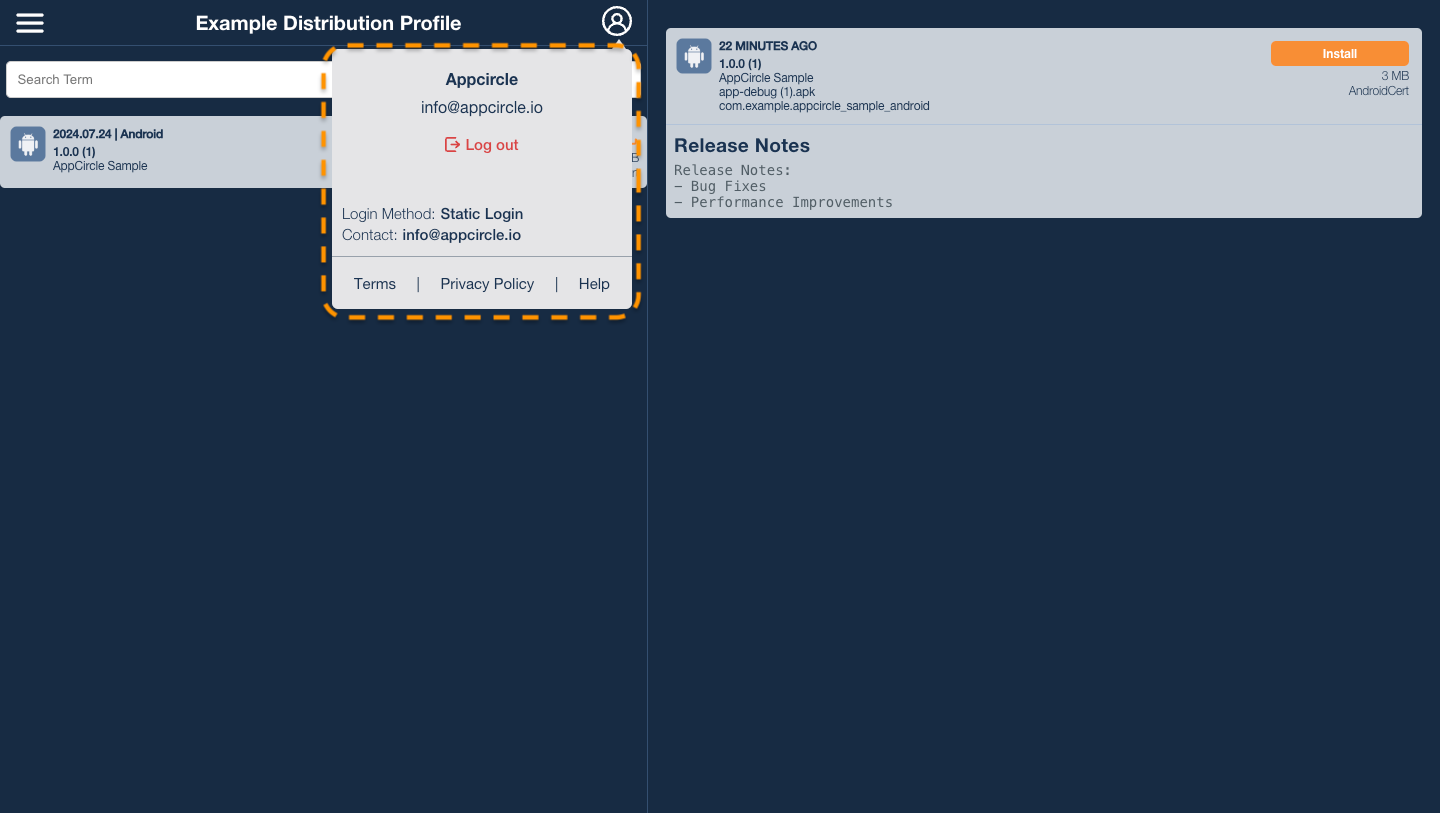
It will also display the Login Method for the Testing Distribution Profile.
In the example image, the profile has static authentication method, so it is displayed as Static Login.
You can find out more about the login methods in the using authentication for distribution section.
Auto Send
Auto send feature lets your applications be distributed to specific testing groups whenever a new version is deployed, whether the deployment is triggered via a build process, CLI, or manual upload.
To enable the auto send feature, you need to create testing groups and add testers to these groups.
Testing GroupsUnder the Auto Send tab in the settings, you can see the testing groups you have created earlier. Just enable each testing group you want to have your application sent automatically whenever a new version is deployed.
The first section allows you to share the deployed binaries automatically with the selected groups. They will receive a link to download the specific version on their mobile devices.
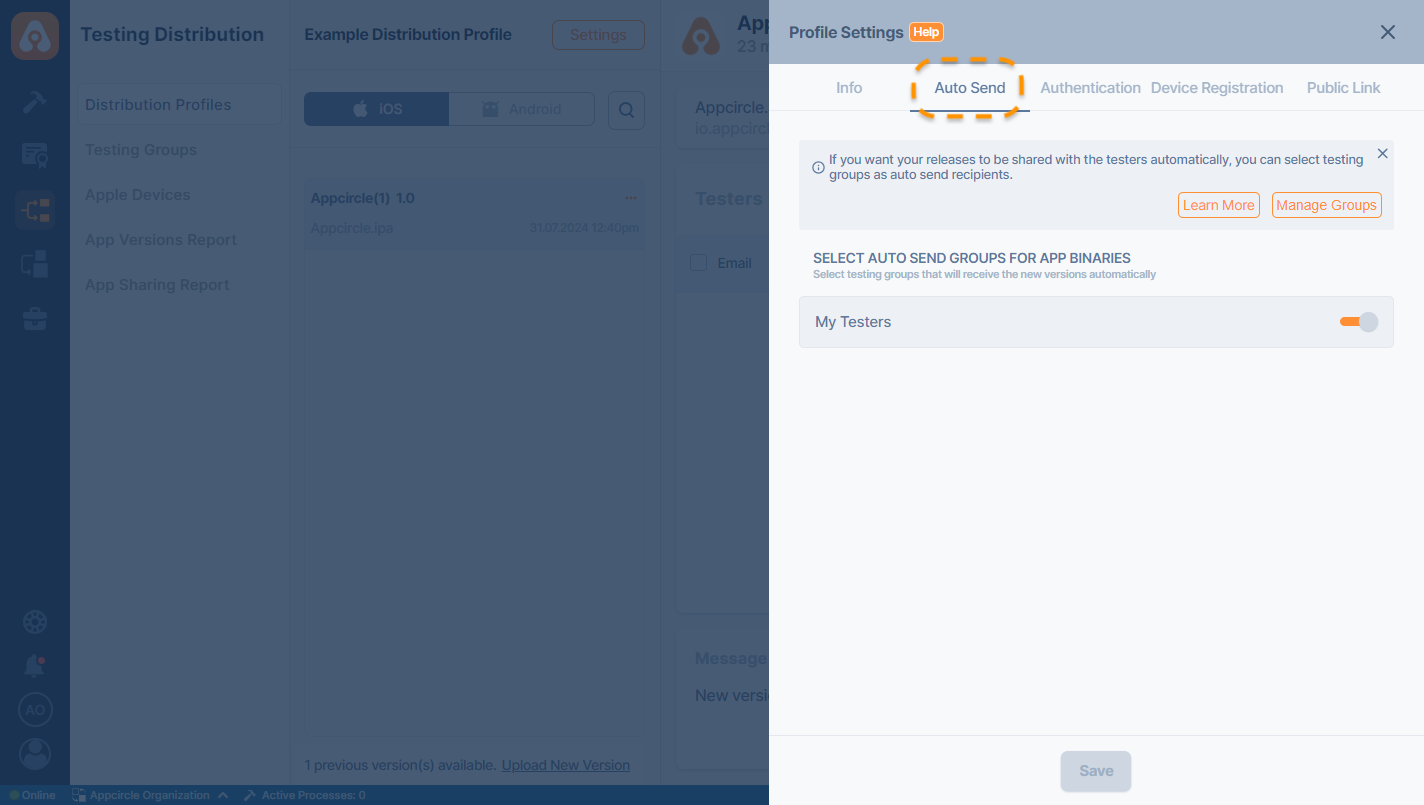
Your application will be sent to the related testing groups as soon as your build is complete, or when a package is manually uploaded or deployed via CLI.
Authentication
Under the Authentication tab in the settings, you can select a preferred authentication method for sharing your application. This will be the login method for the Testing Portal.
- None: No authentication, anyone with the link can download binary files
- Static Username and Password: One single username and password for all testers
- SSO Login: SSO login for all testers (Enterprise accounts only)
- LDAP Login: LDAP login for all testers (Enterprise accounts only)
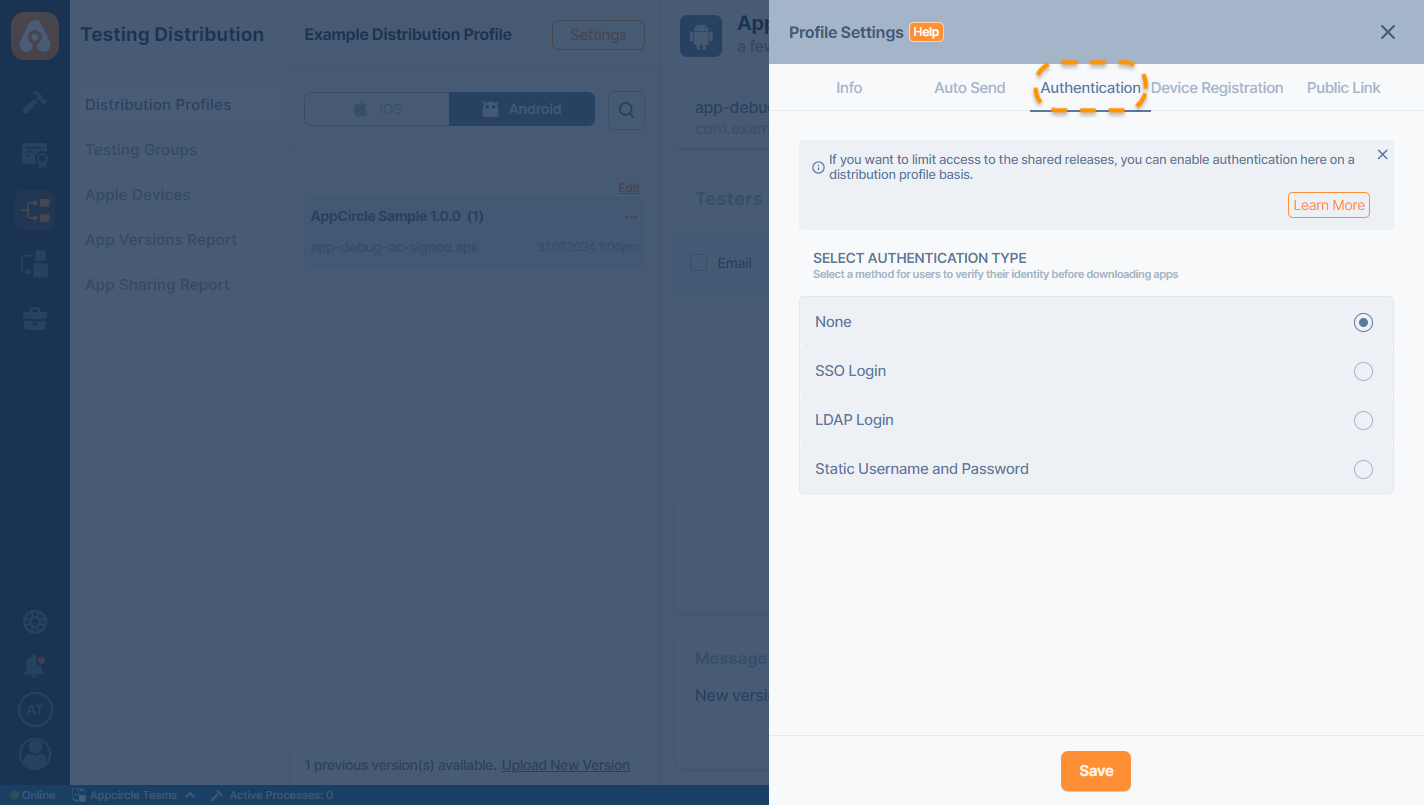
To add your SSO and LDAP details, go to My Organization Integrations screen and press the "Connect" button next to SSO Login or LDAP Login under the "Connections" section.
SSO Login LDAP LoginIf SSO and LDAP details are not configured for your organization, these authentication methods will not be visible in the Distribution Profile settings.
Device Registration (iOS Only)
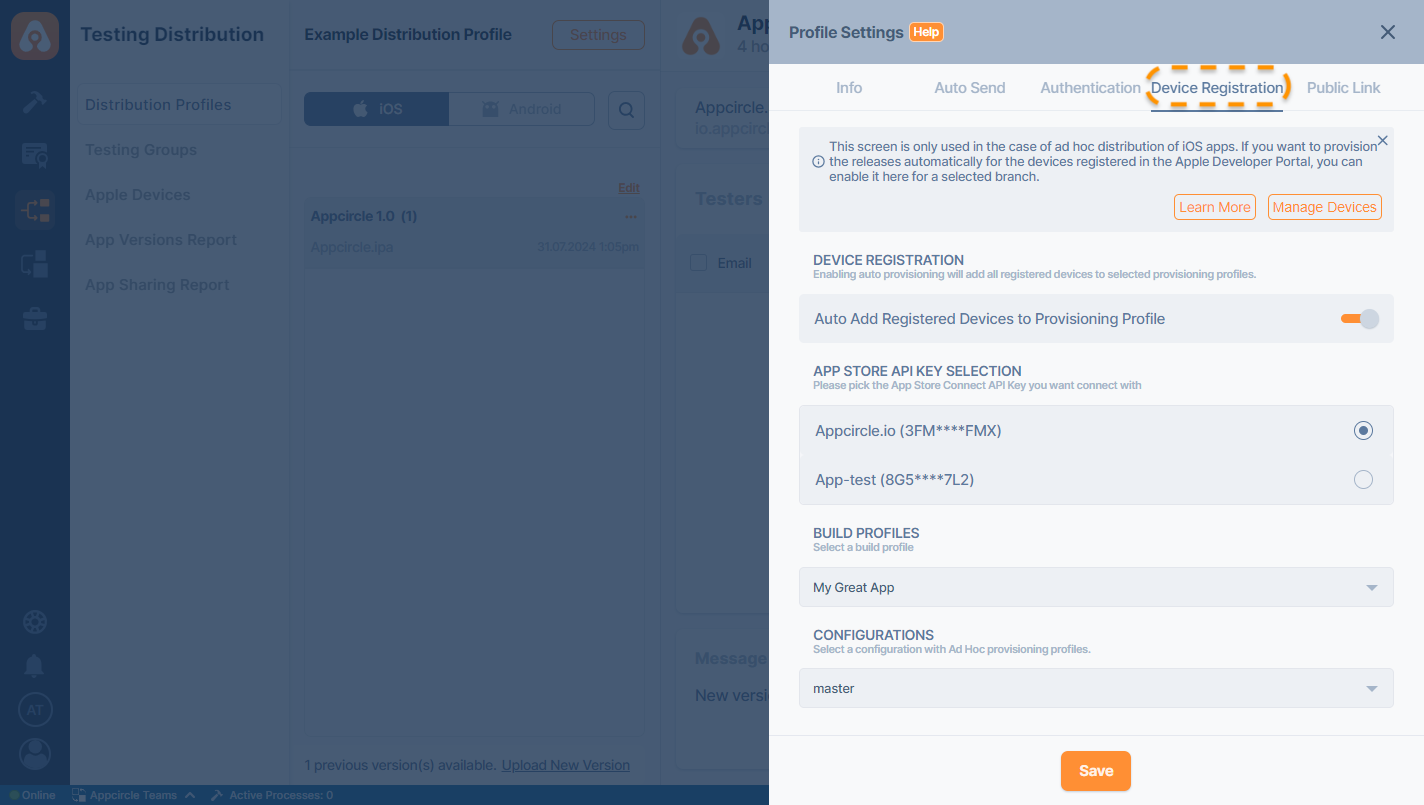
You may enable this option to automatically register devices in the Apple Developer Portal and update your Ad Hoc provisioning profiles. You must select App Store Connect API Key, a build profile, and a configuration.
Public Link
You may enable a public link for your distribution. This allows anyone who has the link to access all artifacts of the distribution profile. Additionally, users can now conveniently scan a QR code to retrieve the public link directly. This simplifies the process of accessing and sharing the distribution link, making it more accessible for users on mobile devices or others who prefer quick scanning.
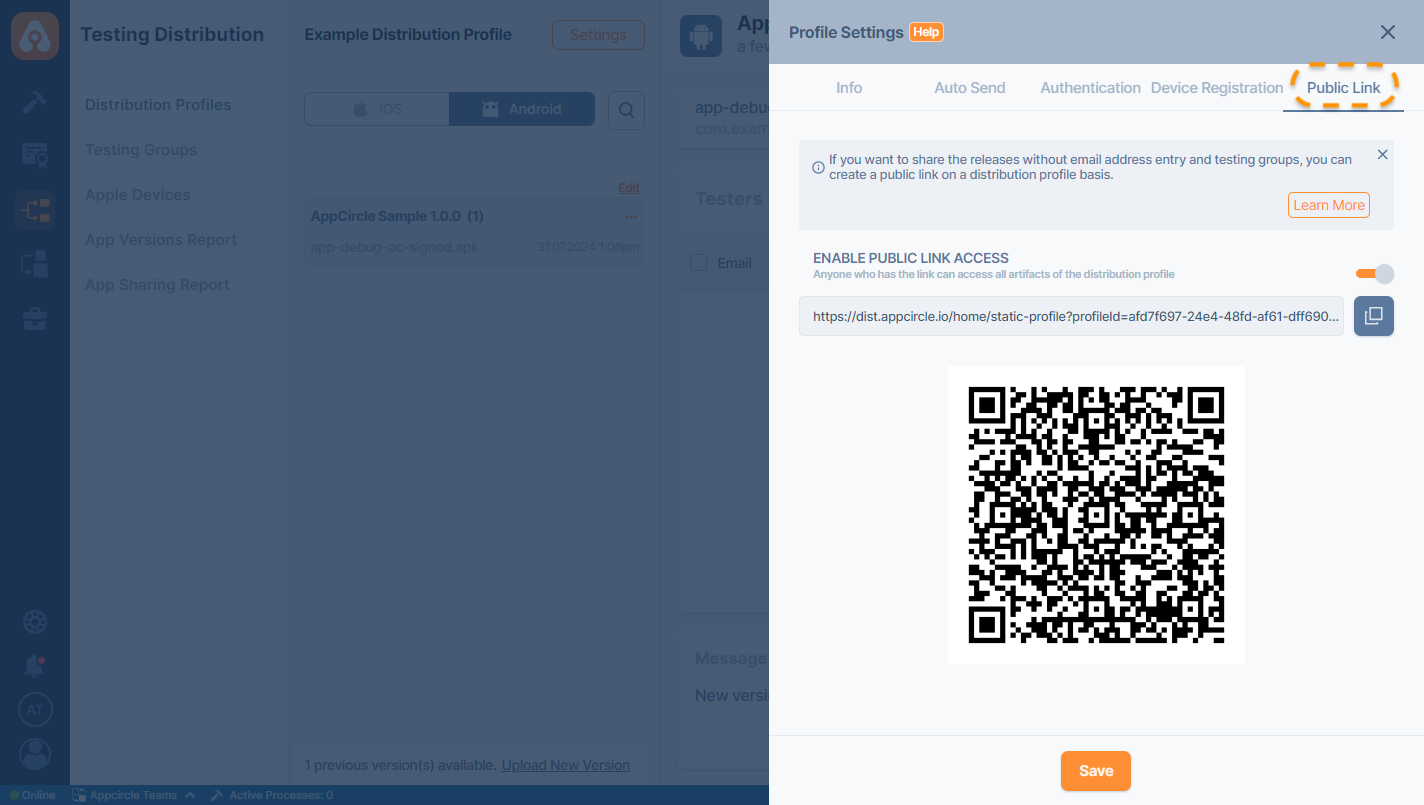
The Tester Portal that you will have access via the Public Link, will have the same authentication method that you have set from the authentication settings.
Share Binary
Share your application with the test groups manually
Once your build is ready or the binary file is uploaded to Appcircle, the file can be manually sent to testers for downloading, installing on their devices, and running the application for testing purposes.
Click on the 'Share with Testers' button, and the testing groups previously created can be selected to receive this version of your application. Alternatively, email addresses of testers can be entered here to send the application directly, bypassing the testing groups.
You can also add a message to testers including testing instructions and release notes.
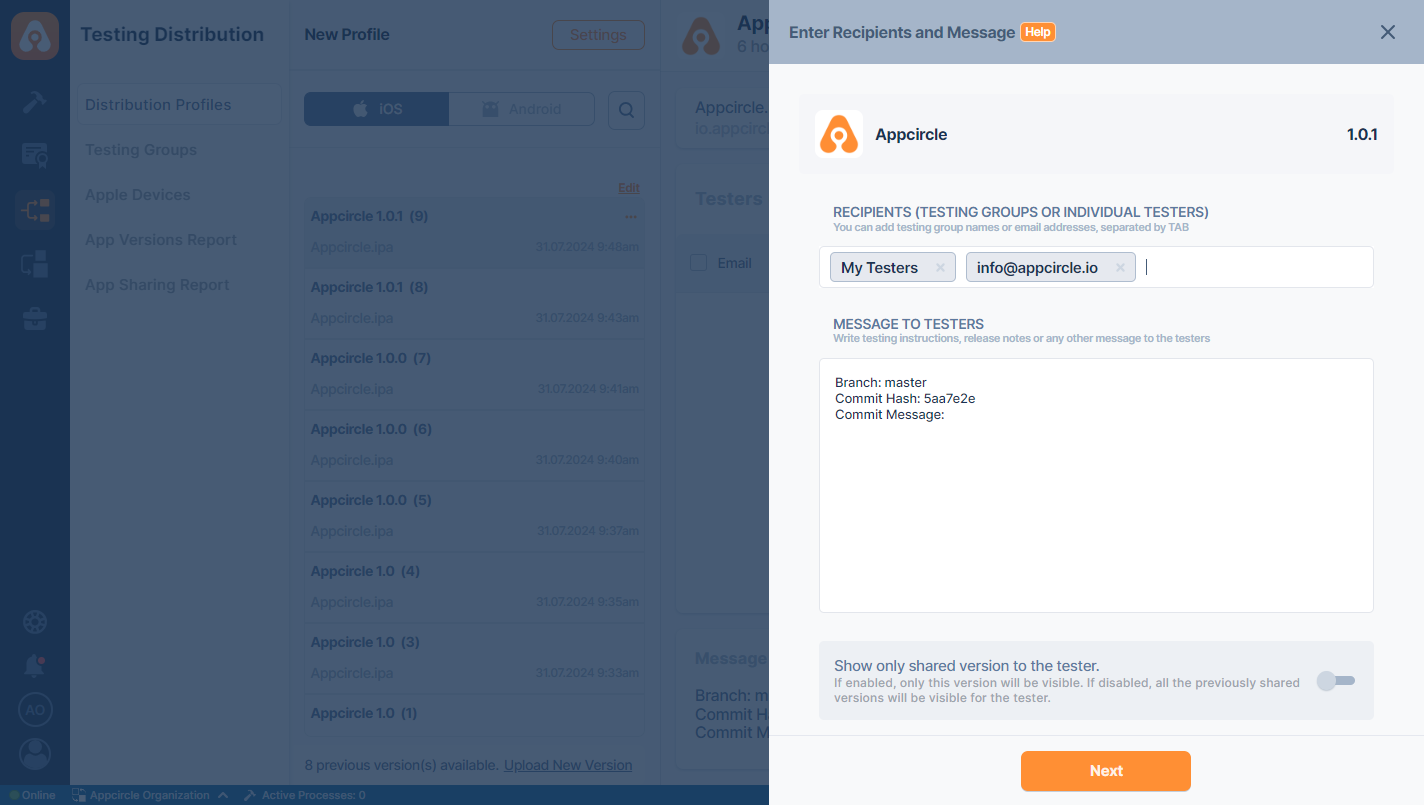
You can automate this message using Release Notes Component. You can enrich the contents of your release notes with environment variables or Ruby snippets. The following default template will print the branch name, commit hash and commit message.
Branch: $AC_GIT_BRANCH
Commit Hash:  <%= ENV['AC_GIT_COMMIT'][0..6] %>
Commit Message: $AC_COMMIT_MESSAGE
If you are using the Self-Hosted version of Appcircle, you can configure it to use your own business domain for distribution emails instead of the default noreply@appcircle.io.
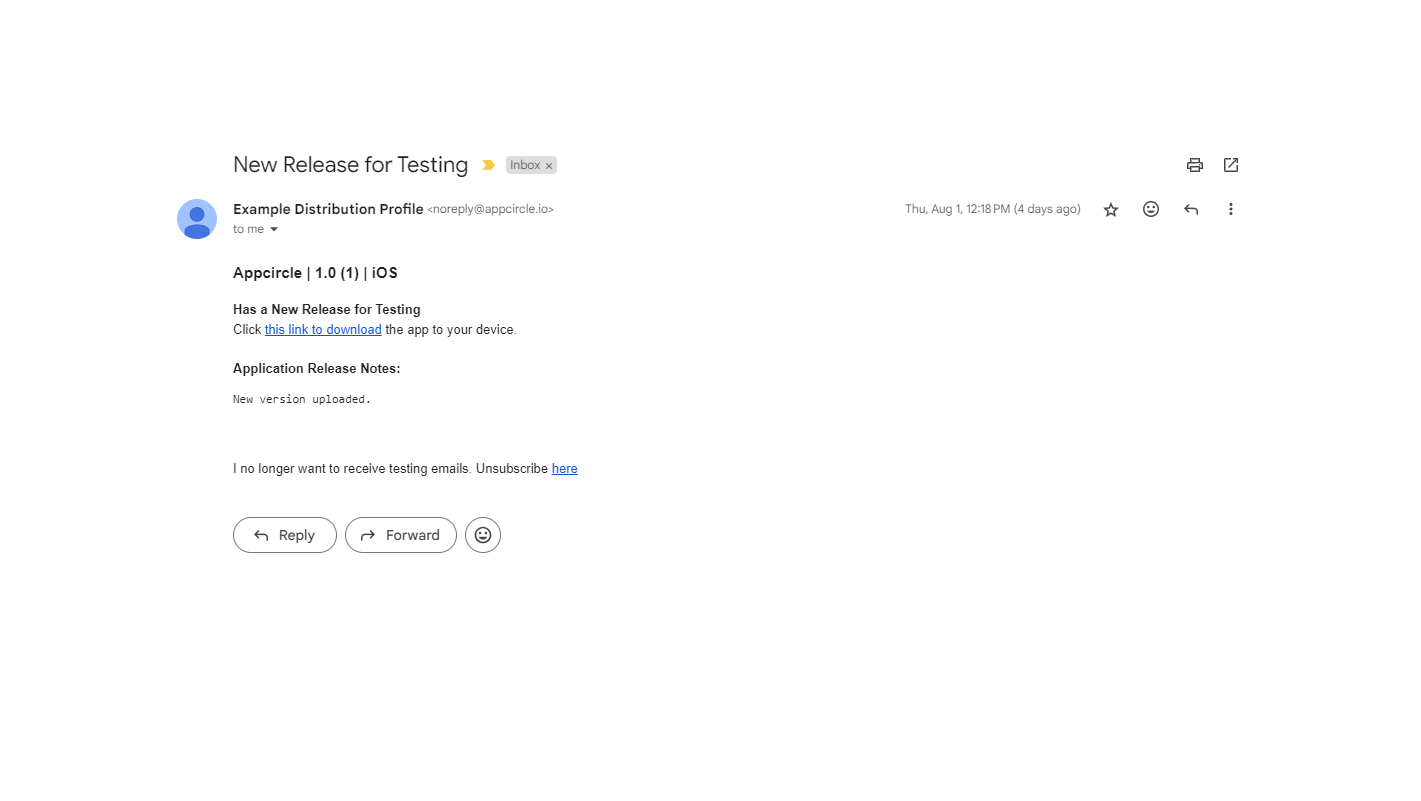
The Distribution Profile name will be displayed as the sender name in the email address that testers will receive.
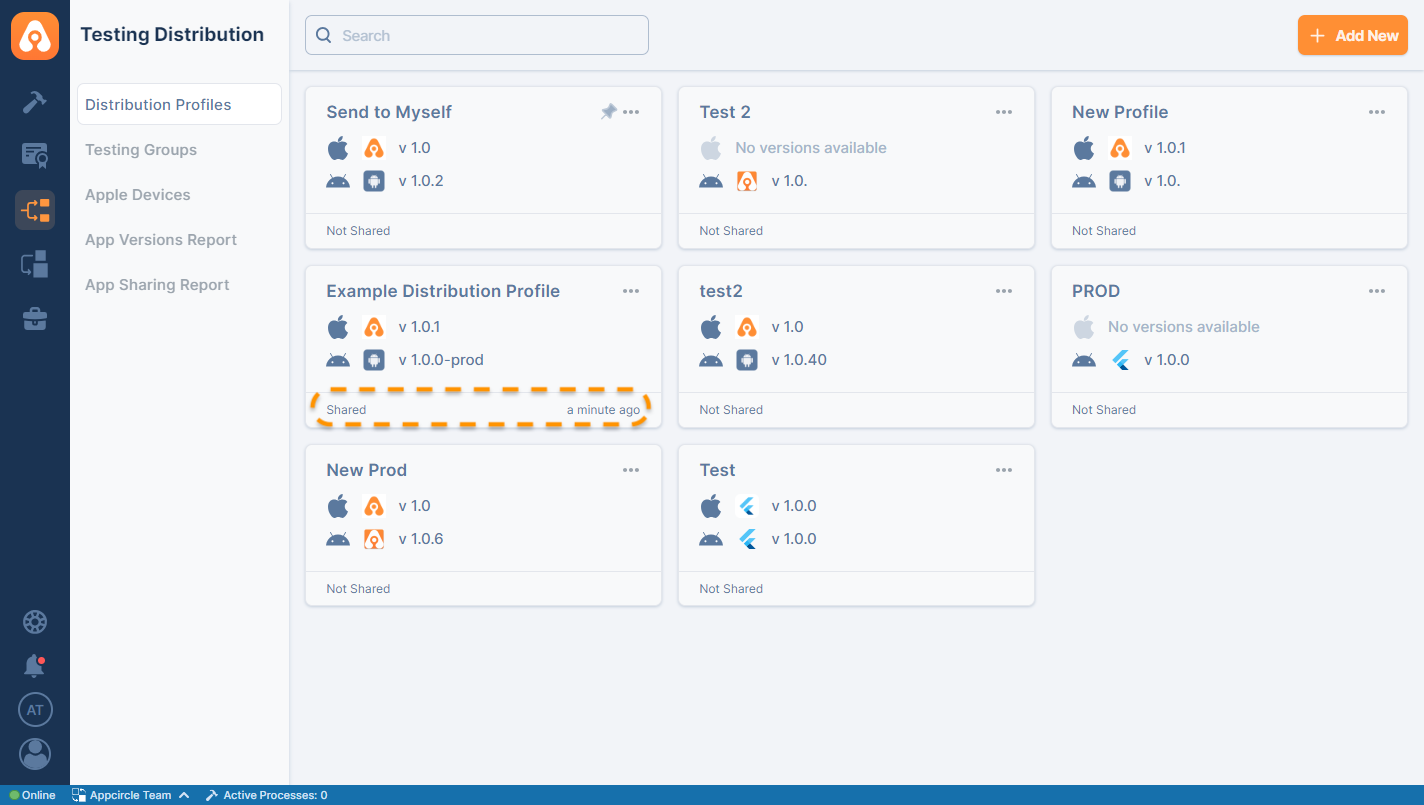
After sharing your app versions with testers, the most recent sharing time will be displayed on your testing distribution profile card.
Tracking your distribution
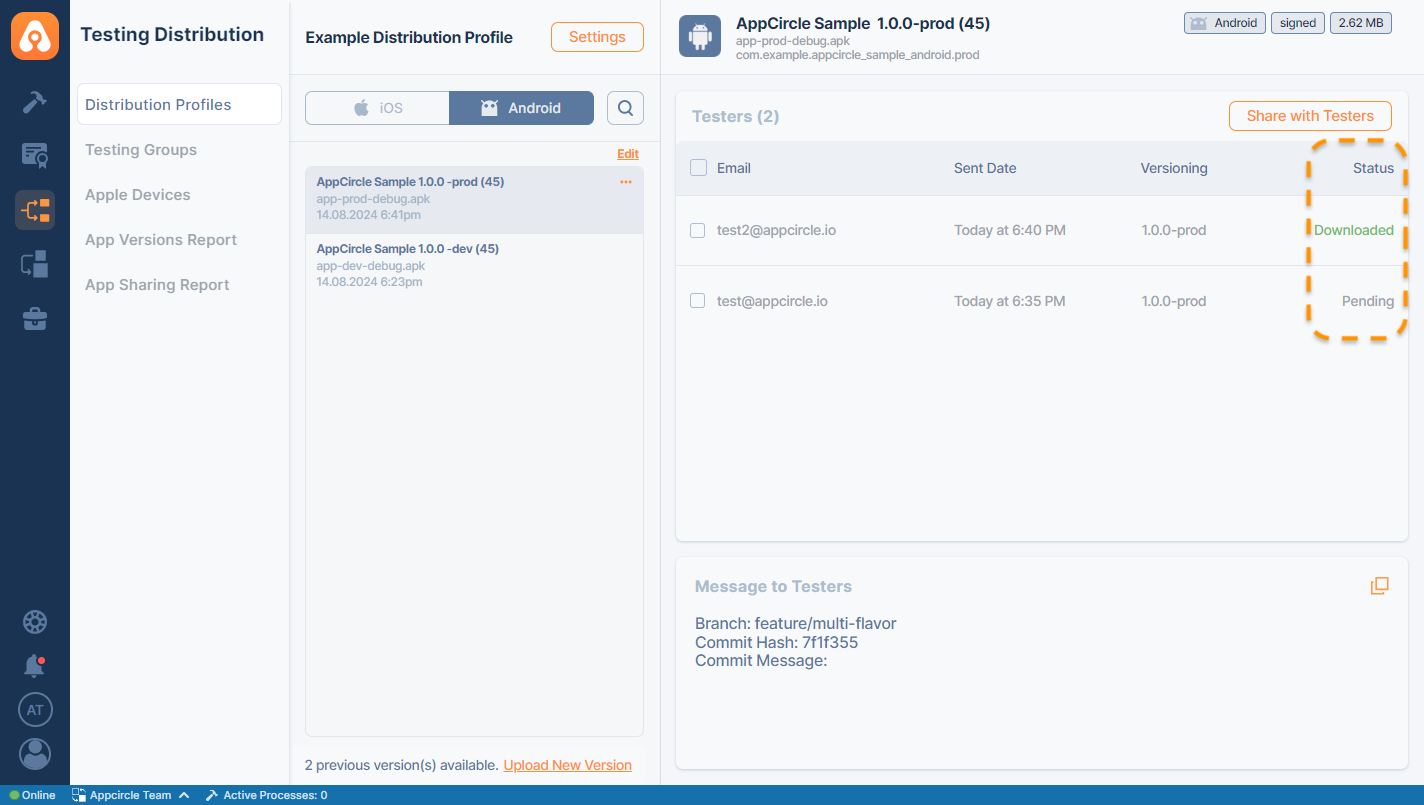
After sending your application to testing groups, you can track the actions of testers:
- Pending - Means your tester didn't click on the link they received yet.
- Clicked - Means your tester clicked on the link they received but has not logged in to the system yet (only for authenticated distributions).
- Login, No Download - Means your tester has logged in (for authenticated distributions) and at the download screen but has not downloaded the binary file yet.
- Downloaded - Means your tester clicked and downloaded the binary file.
Binary Actions
Send your application to Enterprise App Store
You can send your application from your Testing Distribution profile to an Enterprise App Store profile by following these steps:
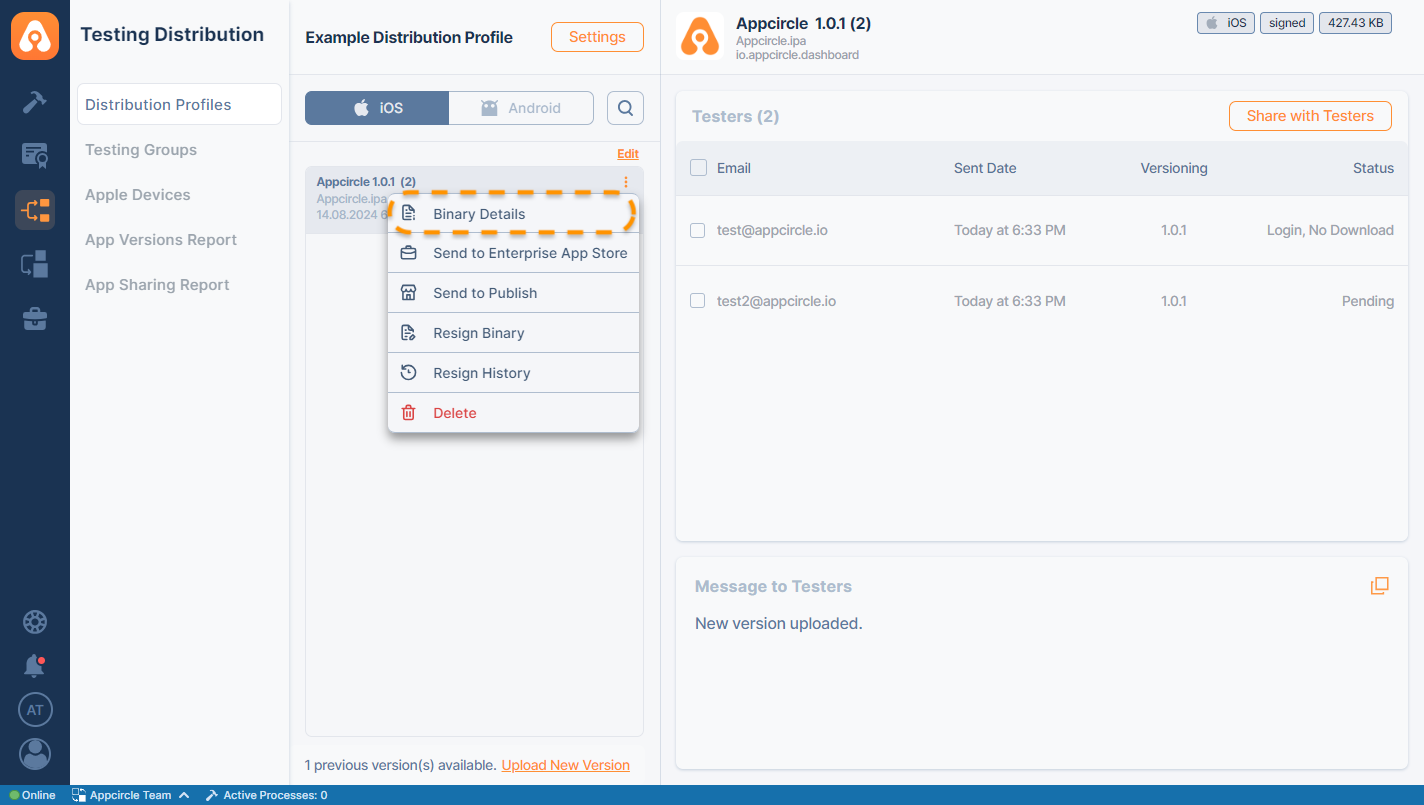
- Click the three dots next to your application.
- Click Send to Enterprise App Store.
- Click Send.
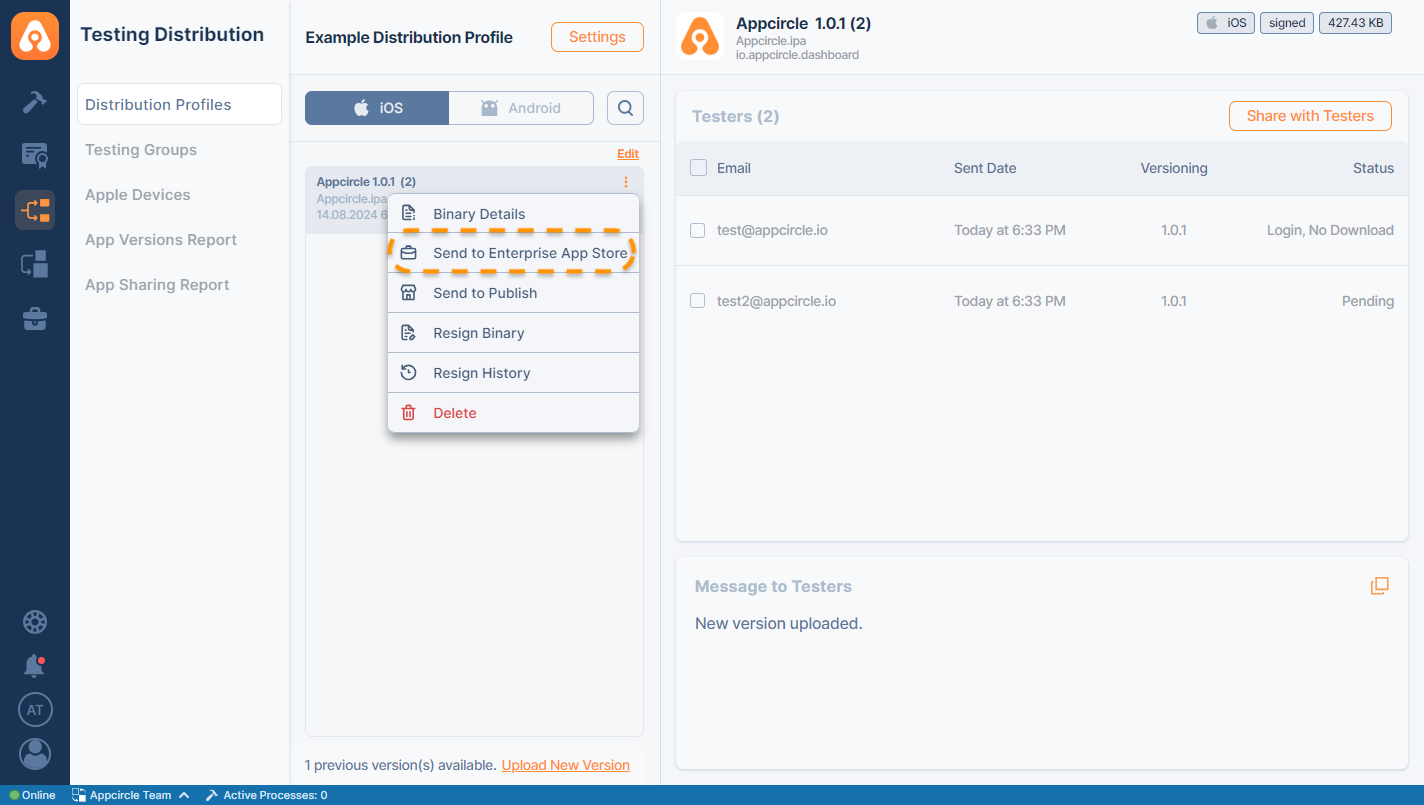
Appcircle will not ask you to pick a profile after choosing the Send to Enterprise App Store option. If the binary is unique, it will create the Enterprise App Store profile automatically. If the same app version already exists within the profiles, it will be delivered within that profile.
Send your application to Publish
You can send your application from your Testing Distribution profile to a designated Publish profile by following these steps:
- Click the three dots next to your application.
- Click Send to Publish.
- Choose your Publish profile from the list.
- Click Send.
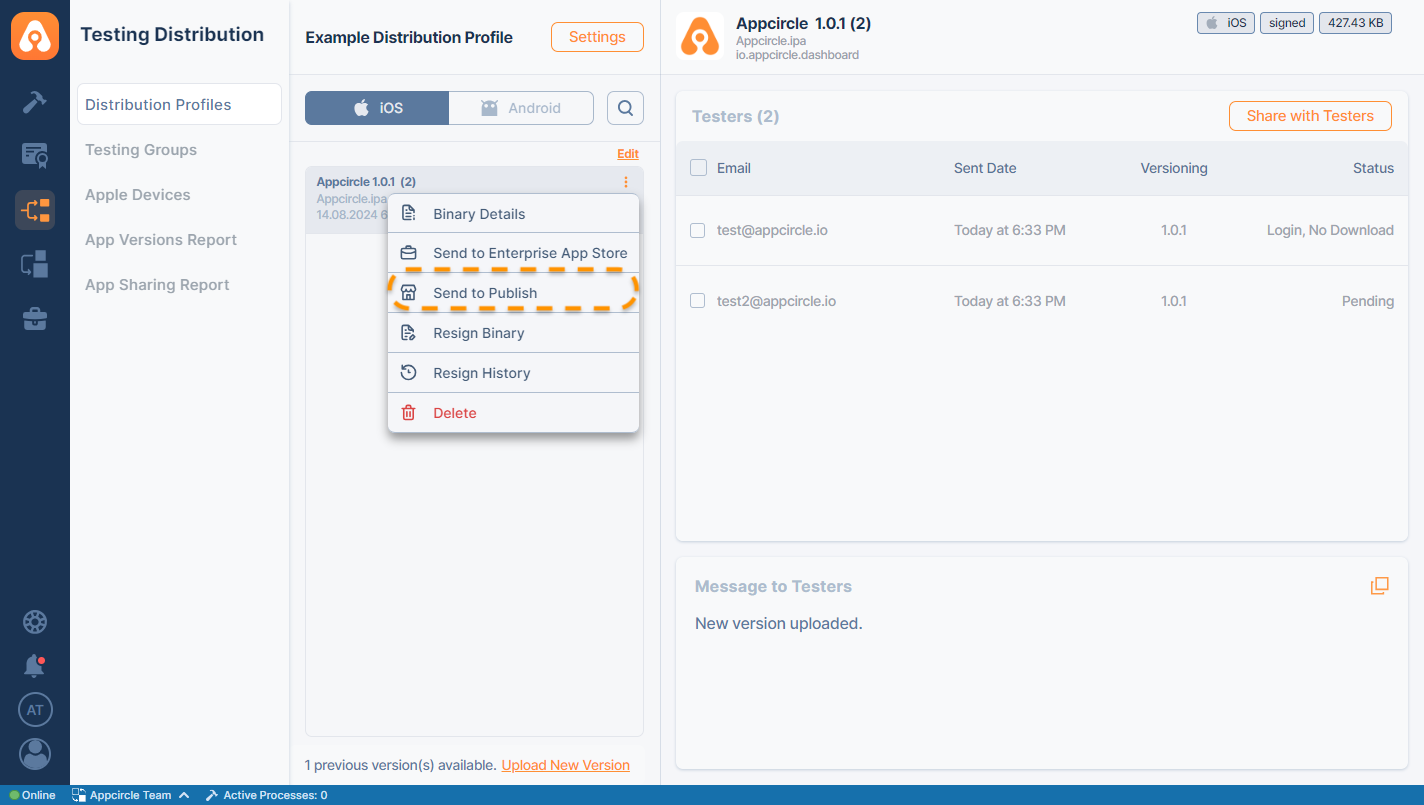
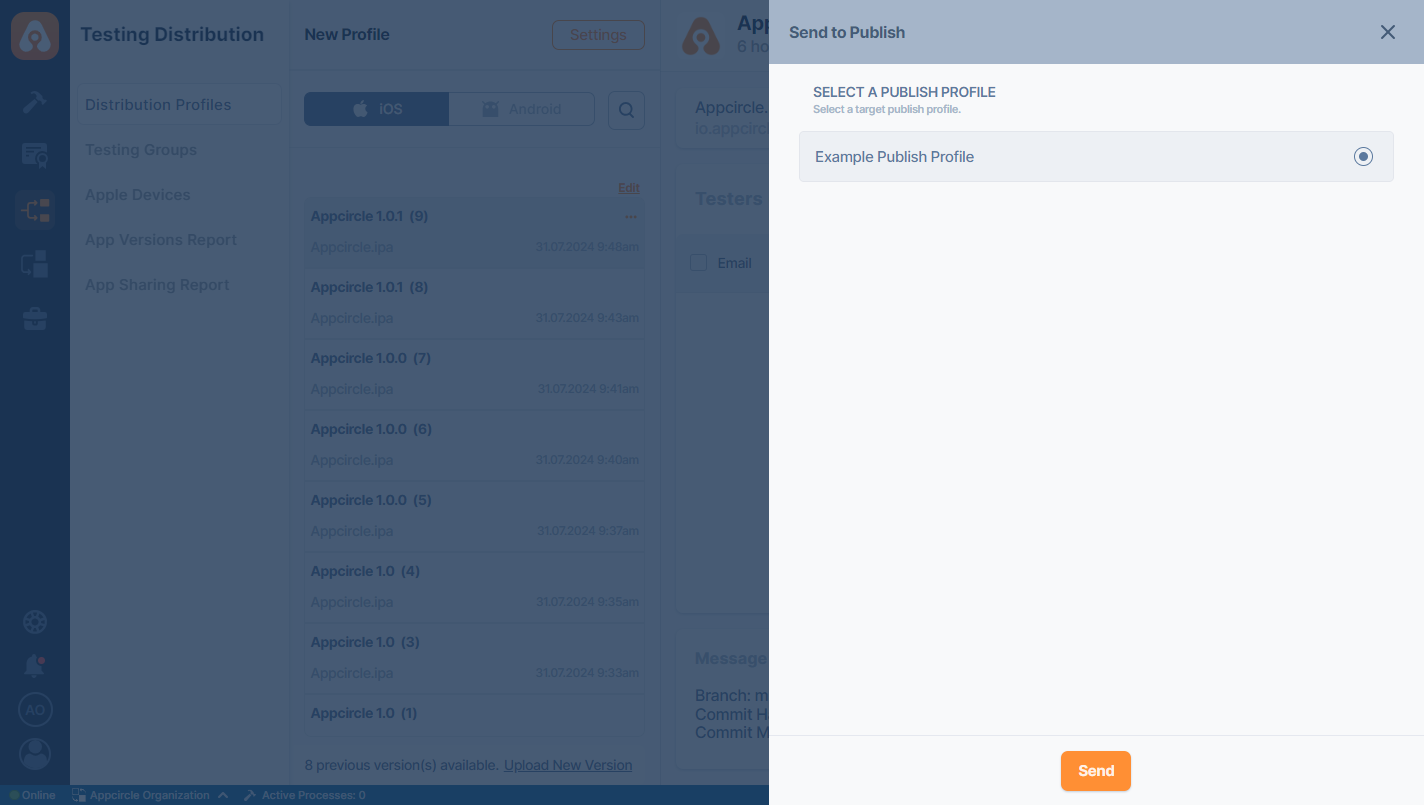
You must have already created the designated Publish profile within the Publish Module, and it should correspond to the operating system of your application (Android or iOS) listed in your Testing Distribution Profile.
Re-sign Binary
Resigning is the process of modifying an existing binary with a new signing certificate or keystore, which is required when an application needs to be published under a different developer account or when updating an existing application. It involves removing the original signature and replacing it with a new one.
For more information please visit the Re-sign Binary documentation.
Re-sign History
Re-sign History allows you to view the re-sign process logs for your app versions. For more information, please visit Re-sign History documentation.
Binary Details
- Select the binary.
You can either select the files from the list or upload binaries by clicking the Upload New Version button at the bottom.
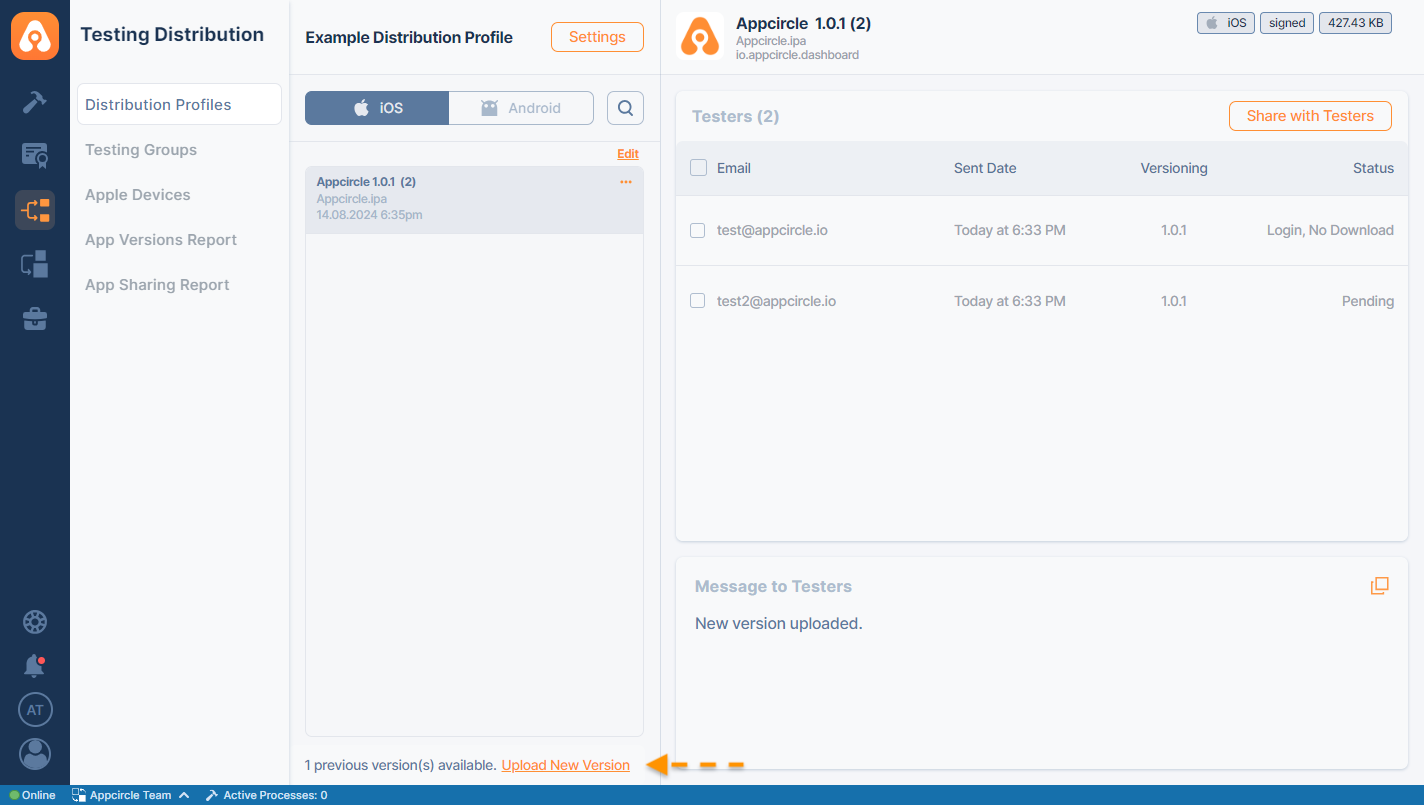
- Click the... button and select Binary Details
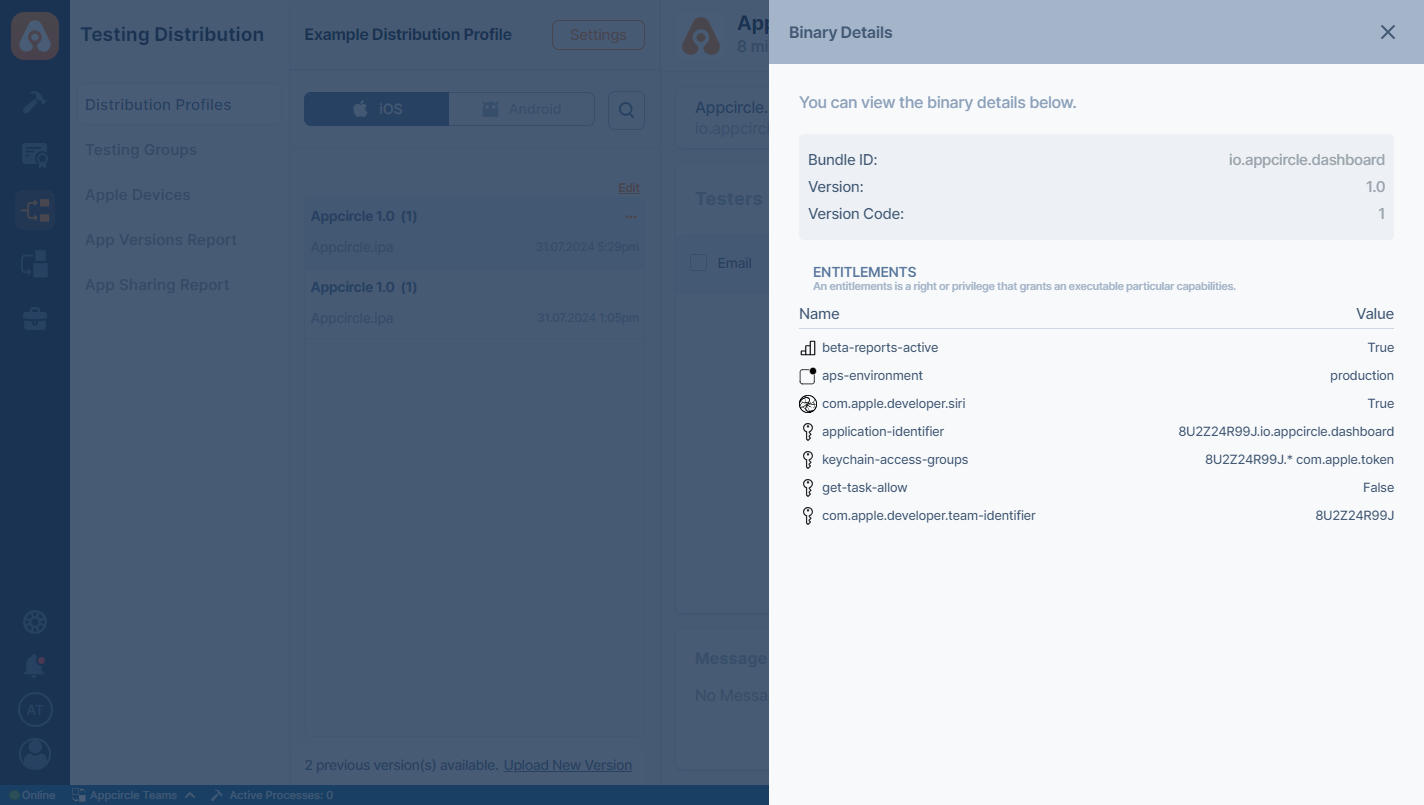
- This window will show basic information about your binary.
Delete Multiple Testing Distribution App Versions
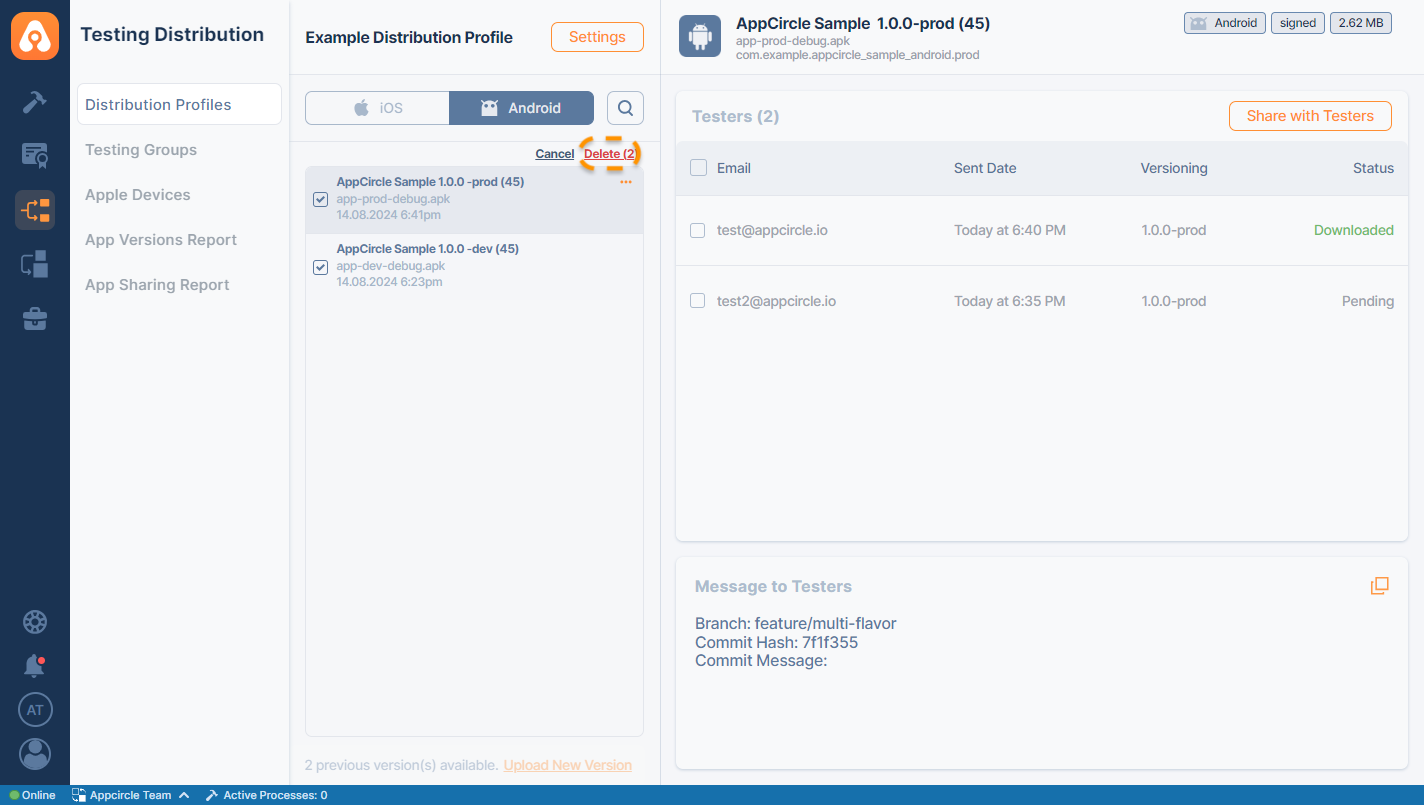
If you don't want to delete an entire distribution profile but free up the past distributions, you can also remove multiple entries.
Click on the Edit Text to toggle edit mode:
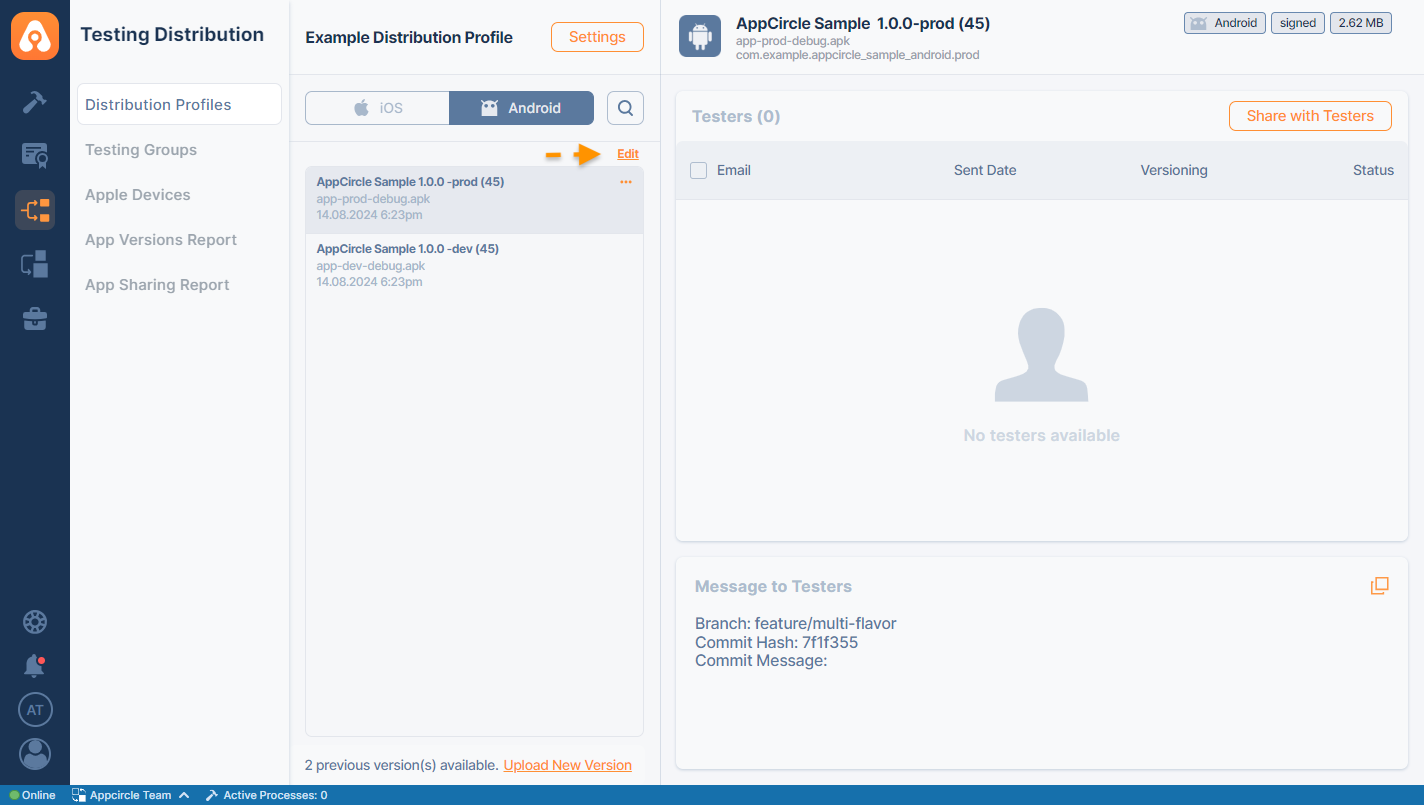
On edit mode, you will be able to select multiple entries. Select the versions you wish to delete, and click on the Delete Text on the top right of the versions:
Delete a Single Distribution App Version
As an alternative method to bulk deleting versions, you can delete a single version by selecting the three-dot menu next to the app version and then clicking delete button.
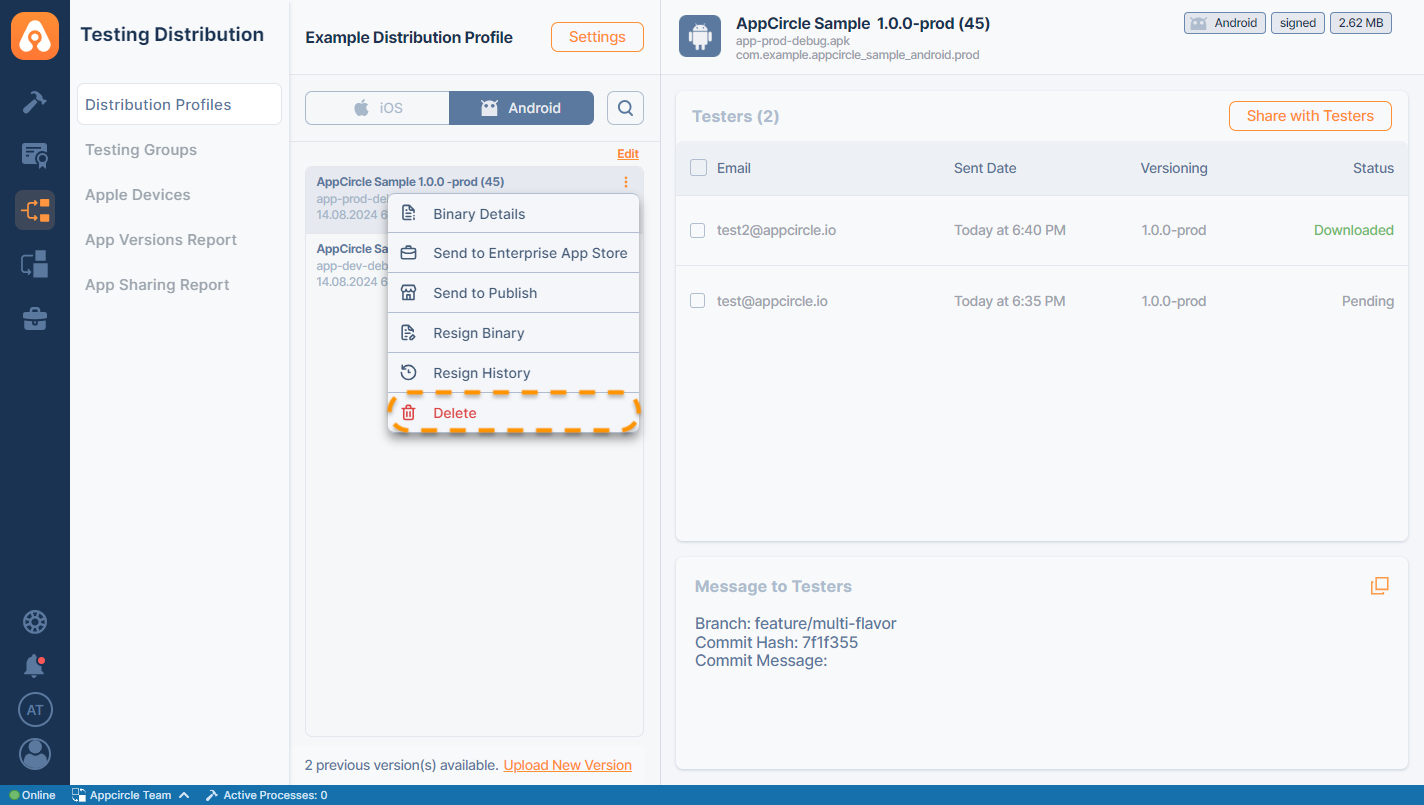
After clicking Delete , type in the version name in the prompt.